
Good morning! Today I’m excited to share our completed master bathroom remodel with you. This was, by far, our biggest DIY project to date, and I’m looking forward to revealing all the details, including our master bath before and after photos, what we learned during this bathroom renovation, cost and time saving tips, and how we stayed within our budget.
Our Master Bathroom Renovation
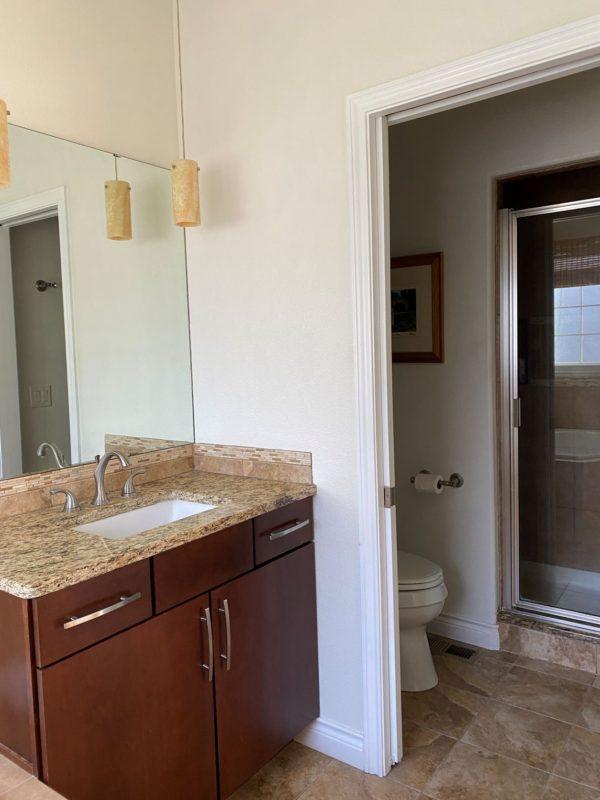
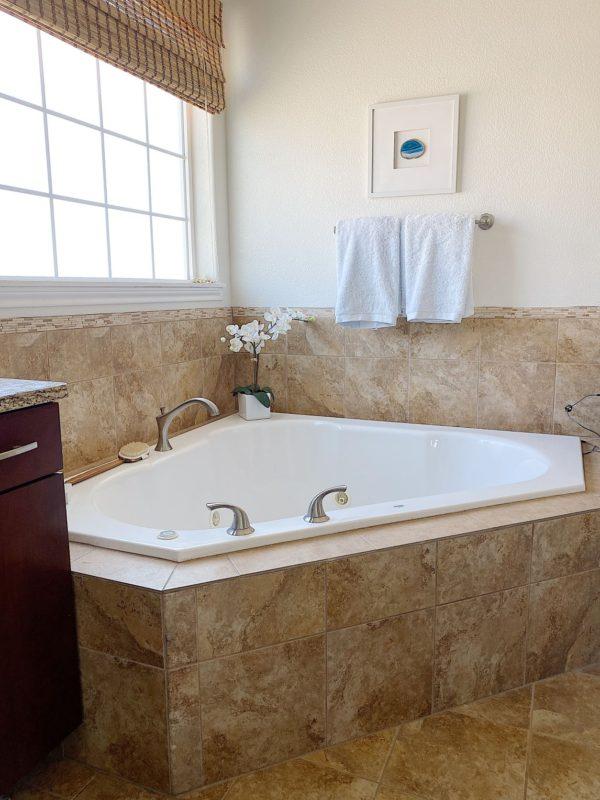
Master Bathroom Before Photos
To start, here are a few photos showing what our primary bathroom looked like before, with a big corner Jacuzzi tub, cherry wood cabinets, and lots of beige tile:
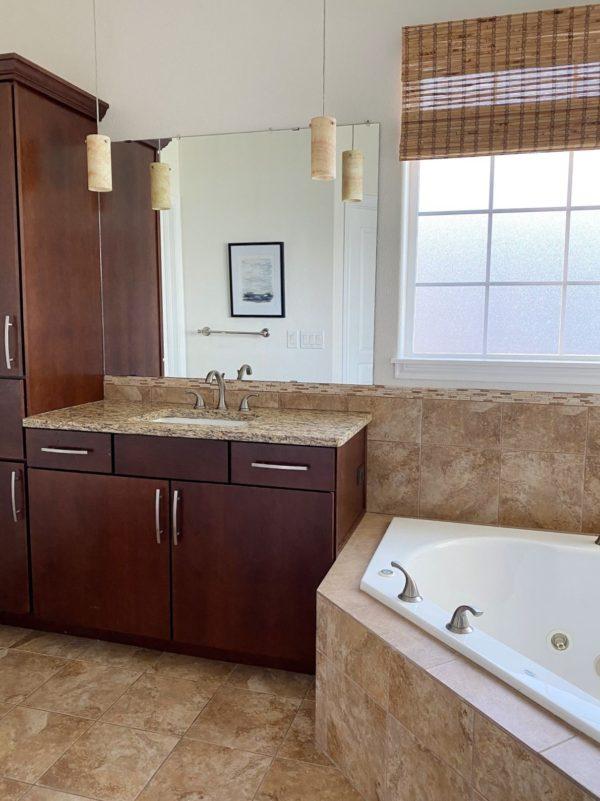
It was a nice big bathroom, and I always loved the separate vanities and sinks. But the cave-like shower enclosure, gold granite countertops, and beige tile made the entire bathroom feel very dark and dated.
After updating our guest bathroom last year and seeing what a huge difference that made, we knew it was time to freshen up this space, too.
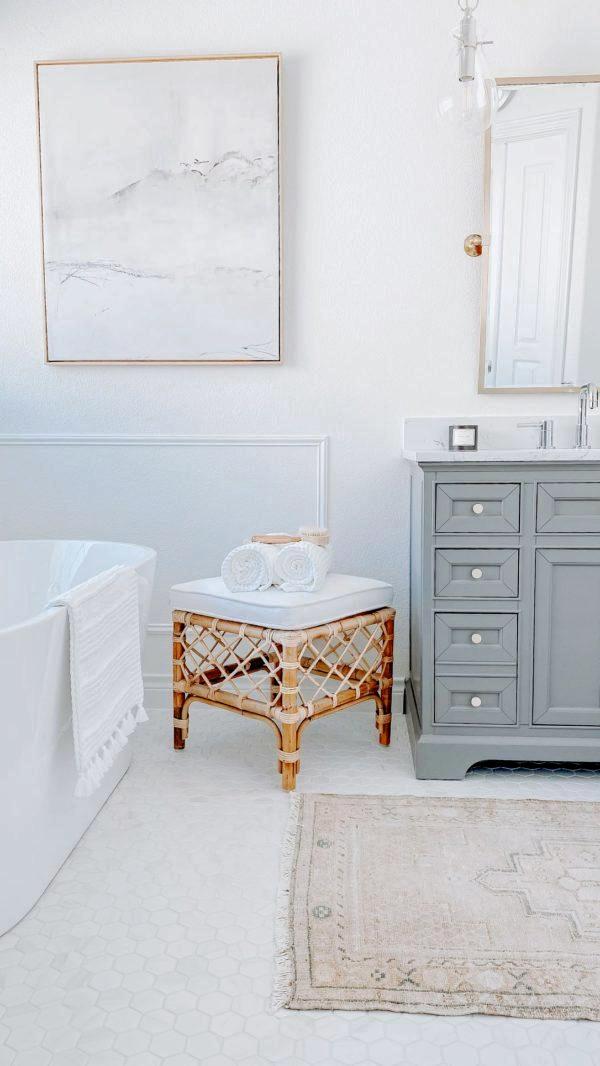
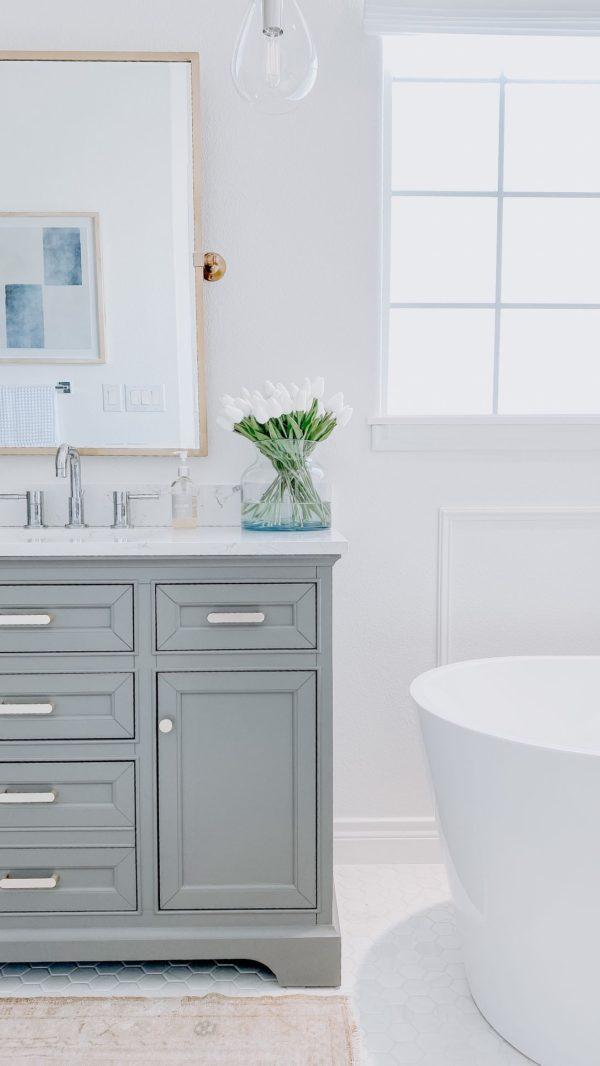
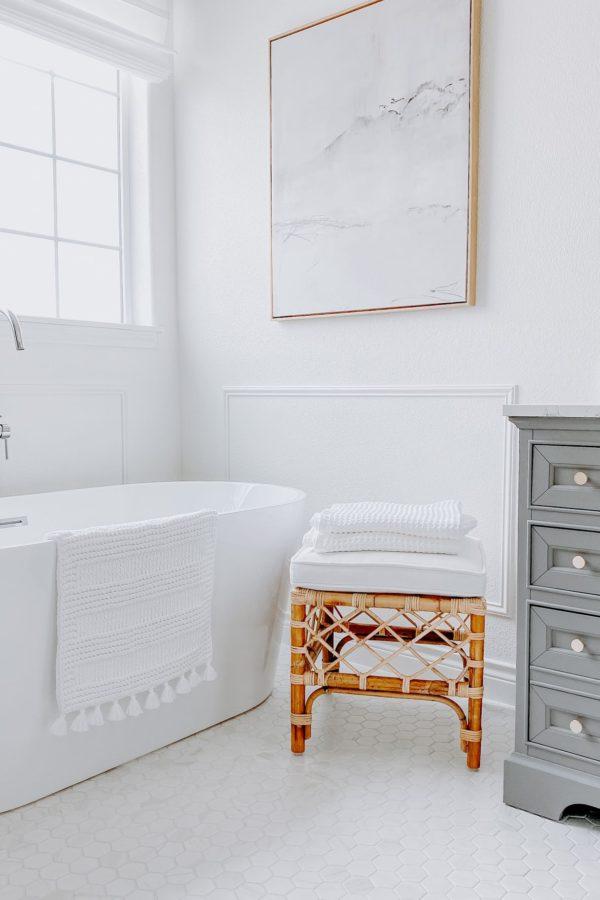
Master Bathroom After Photos
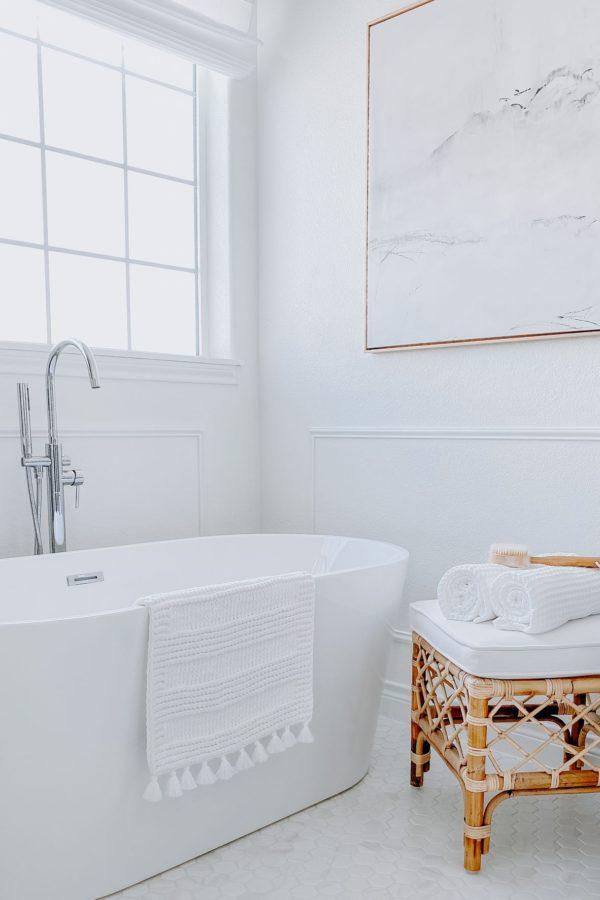
Here’s a look at this same corner now, with a free-standing tub and faucet, new floor tile, and refreshed wall paint and panel molding:
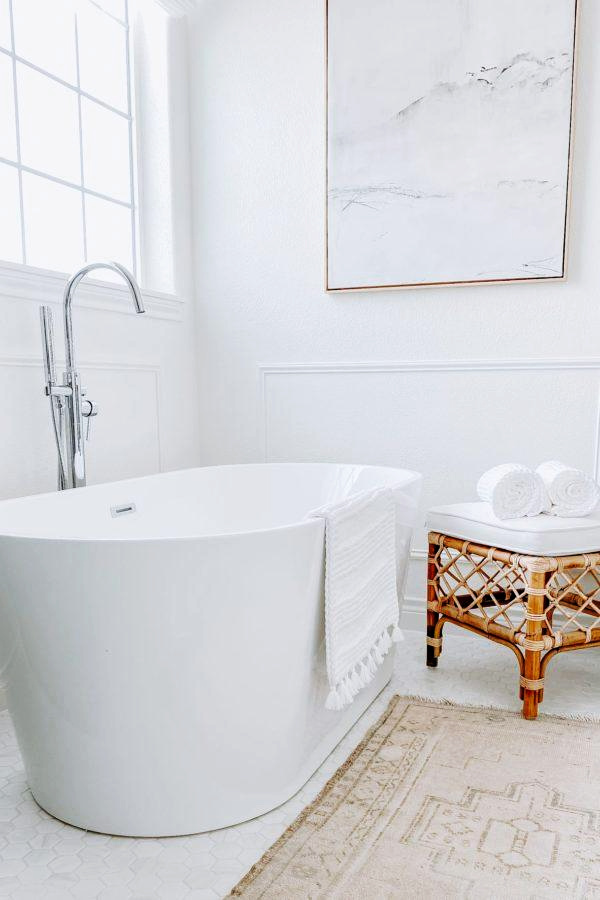
Just removing that big corner tub and all the dark tile made a huge difference in how this space looks and feels.
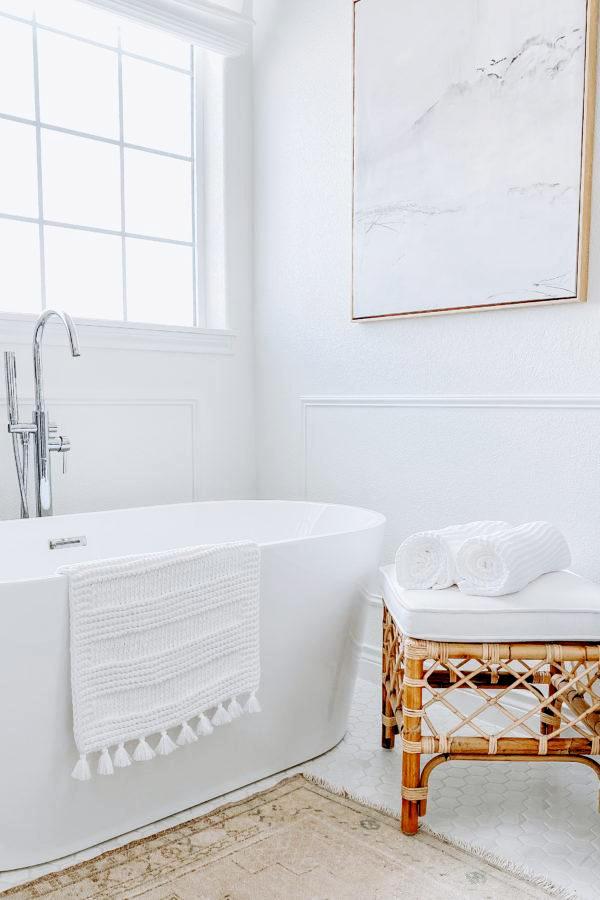
Even though we kept the layout of our bathroom the same, it feels much larger due to the white finishes on the walls, tub, countertops, and floors.
I actually thought about ordering white vanities, too, but decided to keep some contrast with gray cabinets.
Shower Enclosure
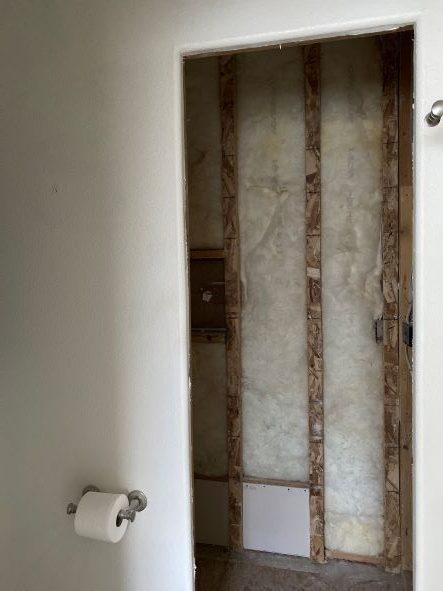
The only structural change we made to our bathroom was removing the wall that enclosed our shower.
As you can see in this photo, with only one overhead light fixture and floor-to-ceiling brown tile, our shower enclosure was dark, narrow, and a bit claustrophobic!
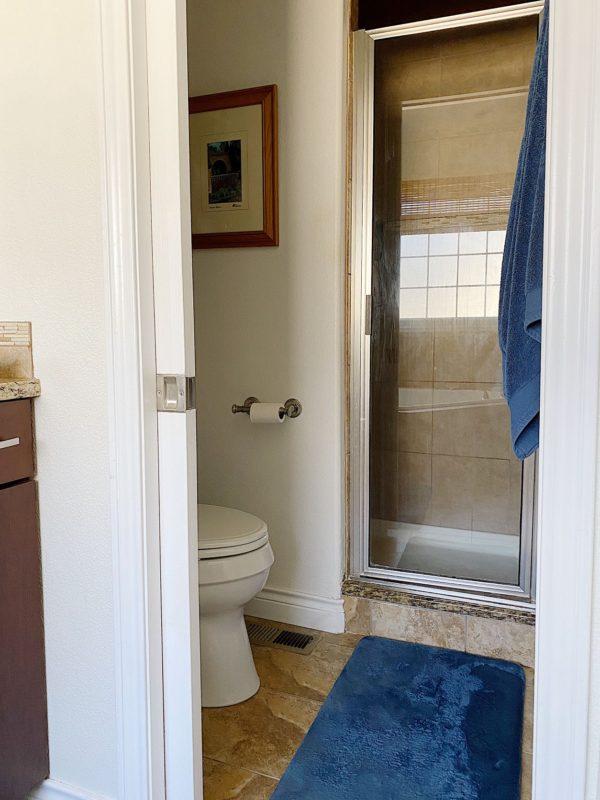
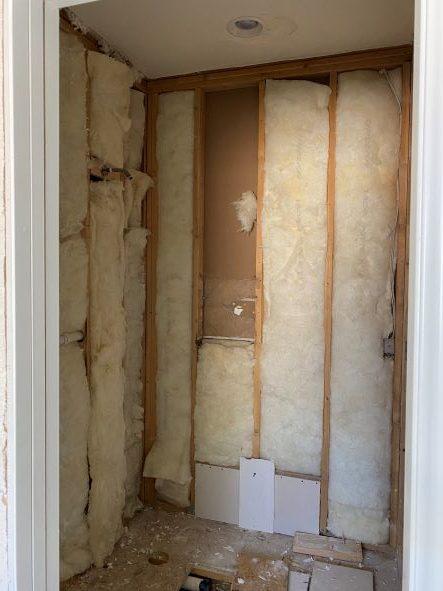
Since we were gutting the shower anyway, my husband took the opportunity to brighten the entire shower area and toilet room by removing the wall and replacing it with a glass shower enclosure.
Having the wall out of the way also made it much easier for him to remove and replace all the tile.
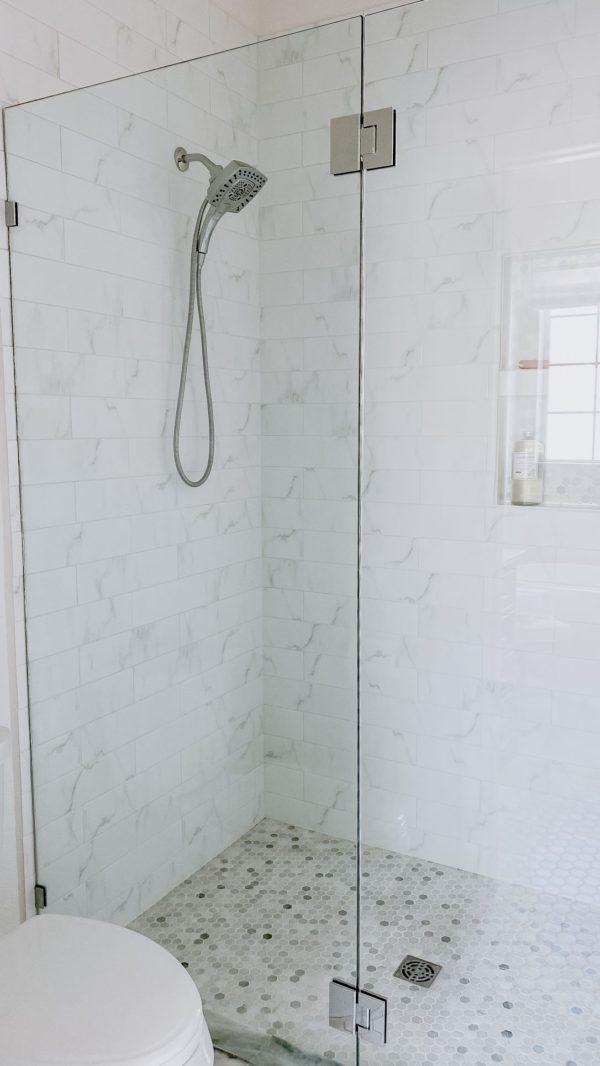
Not only did tearing out the wall make our walk-in shower much lighter and brighter, it had the unexpected happy result of making it slightly larger.
Even though it only added 2 or 3 extra inches, it made a world of difference!
Removing the shower wall also involved moving the plumbing to a different wall, since that was where we turned on the shower.
We called in a professional plumber for that job, as well as moving the tub plumbing and installing the freestanding bathtub and tub faucet.
Our previous shower had a fiberglass floor, which apparently wasn’t water-tight, because when my husband removed the shower pan, he discovered quite a bit of mold underneath. Yikes!
Due to the unexpected mold issue, updating the shower enclosure ended up taking much longer than expected, because my husband and son-in-law had to cut out and replace all the moldy floor boards and joists.
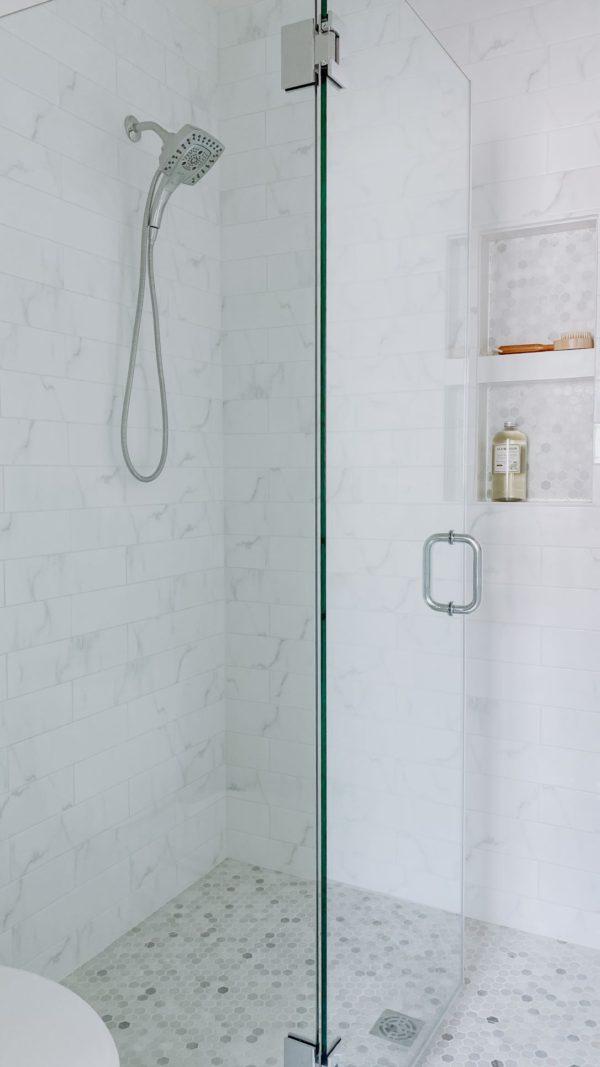
Despite the delay, our new glass shower enclosure ended up being the best part of our master bathroom remodel. I still can’t believe what a difference it made! (And I’m so thankful we discovered and got rid of the mold lurking underneath our shower!)
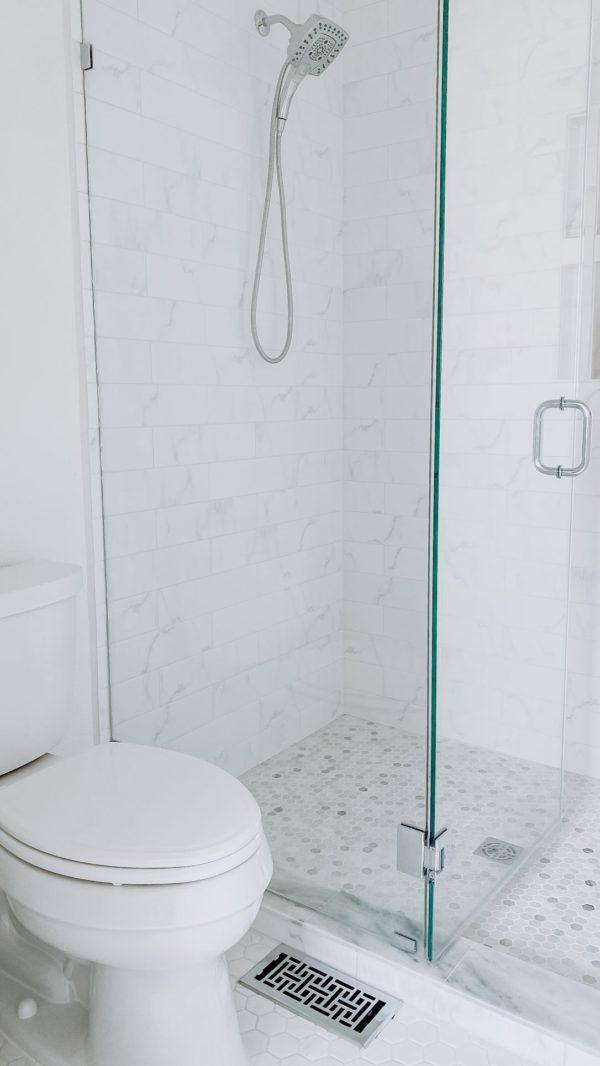
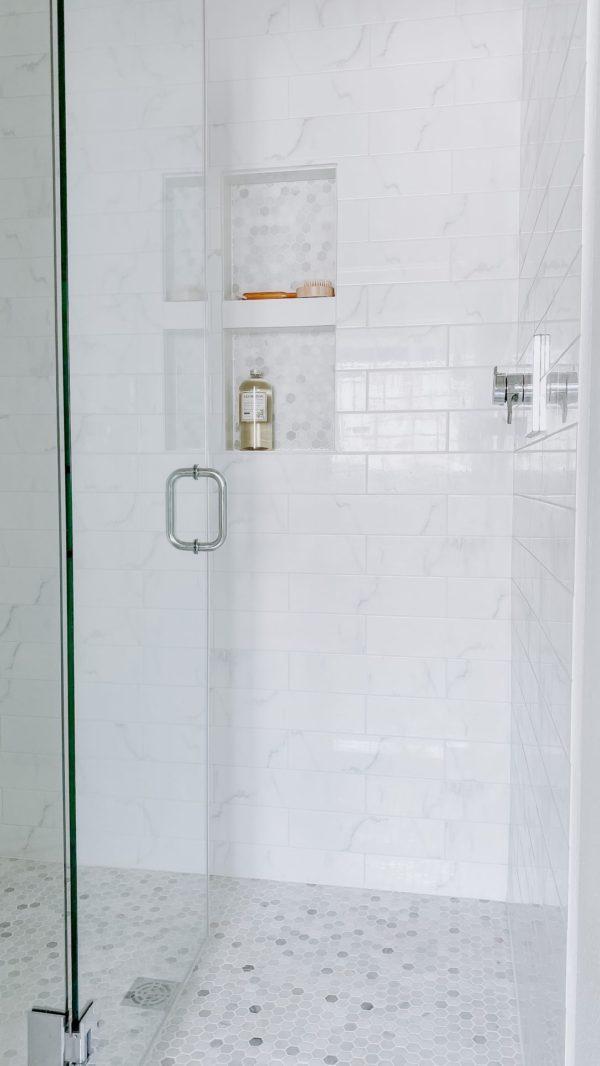
Using a frameless glass shower enclosure also made a huge difference in making this space feel bigger, brighter, and more luxurious.
We also used the Schluter shower system, which involved ordering this shower kit, this drain kit, this mortar, and this shower niche kit, all of which we found on Amazon.
My husband also watched a lot of YouTube videos to learn how to install everything correctly.
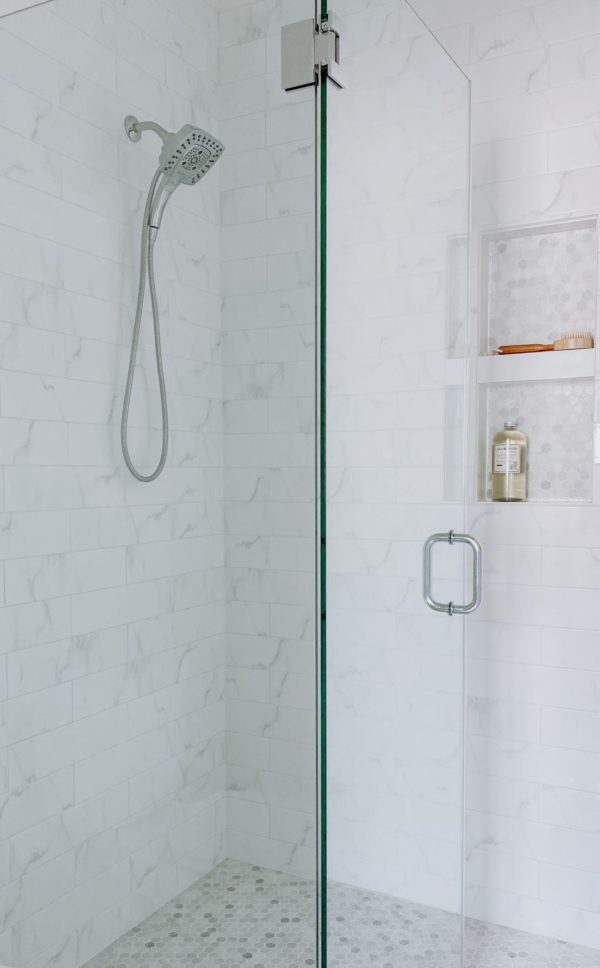
Shower Tile
For the shower floor tile, I ordered these Carrara marble mosaic floor tiles and am so happy with them.
The quality is great, they were much more affordable than I expected, and shipping was free!
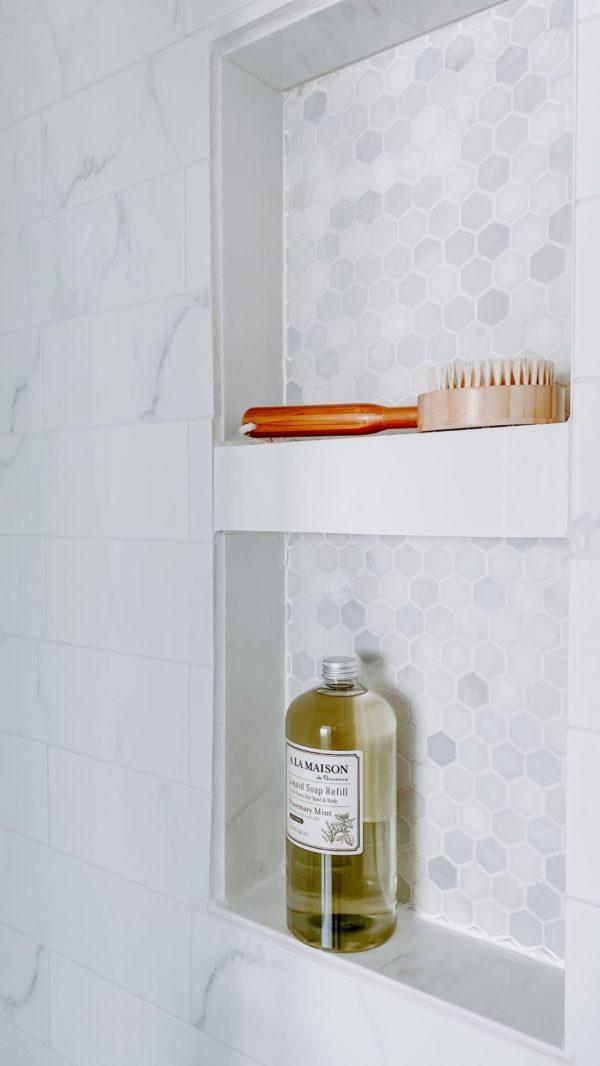
In fact, we loved the mosaic marble tile so much, we ended up installing it in the shower niche as well.
On the shower walls, we used elongated tile with light gray marbling. Ours is no longer available, but here’s a similar marble tile.
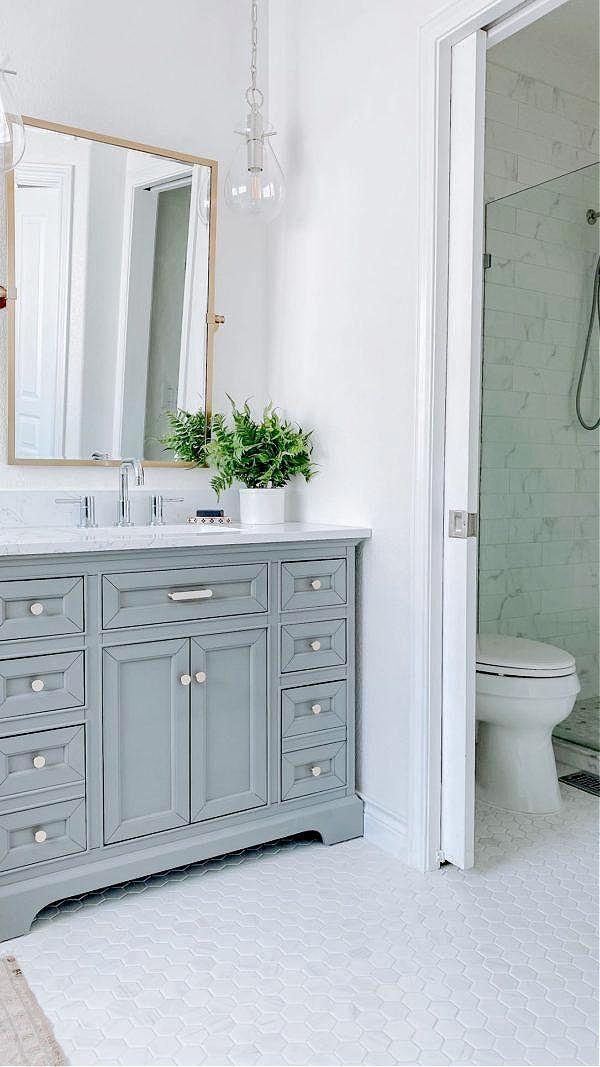
Vanity Cabinets
The vanity cabinets were our very first purchase for this space. They came with the sinks and countertops attached, which was nice.
They also came with lovely brushed nickel drawer and door pulls, but since we had so much brushed nickel going on in our bathroom, I opted to replace the pulls with brass versions.
Light Fixtures
Choosing light fixtures to hang over the vanities was a bit tricky since they couldn’t be too large in diameter or they’d hit the mirrors or walls.
I considered dozens of options before finding these teardrop shaped glass pendants. I chose the polished nickel finish, but they also come in aged brass and bronze.
These pendant lights ended up being the perfect blend of classic and modern I was going for, and they give off just the right amount of glow — perfect for doing my makeup in the morning without any harsh shadows.
The only downside is they do require regular dusting — something I’m not great at keeping up with!
Faucets and Mirrors
At first, I planned to go with the traditional curvy style faucets that are so popular right now.
But since our vanity cabinets have a traditional style look, I wanted something a bit more modern to keep the overall look lighter and more contemporary.
Ultimately, I chose chrome faucets with a sleek mix of angles and curves. Ours are no longer available, but here’s a similar version that’s on trend right now.
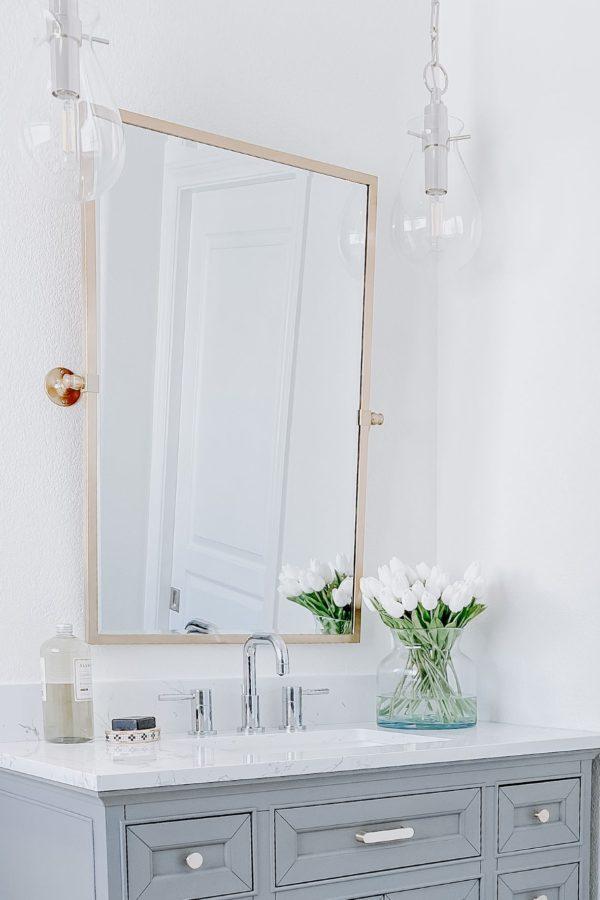
Pivoting wall mirrors were on my wish list long before we began this project.
Pottery Barn sells a beautiful version which I initially planned to purchase, but then I found these mirrors which are almost identical. And, at half the price, they were an amazing deal.
Not only does the pivoting feature add a bit of visual interest to our bathroom, I actually love being able to tip the mirrors downward for an expanded view of whatever I’m wearing.
Wall color and trim
The wall paint color is White Dove by Benjamin Moore, in satin finish. We have the same shade in our adjoining master bedroom.
After the walls were freshly painted and before the tub was installed, the area behind the tub looked like it needed a little something so Dave added some picture frame wall molding, which we found at Lowe’s.
Since we have the same type of molding in our master bedroom, it made sense to install it in here as well.
I think the total cost for the molding was less than $100. And since Dave’s installed this style of molding so often, the entire job only took him a couple of hours, if that.
I’m so glad we added in that simple detail at the 11th hour.
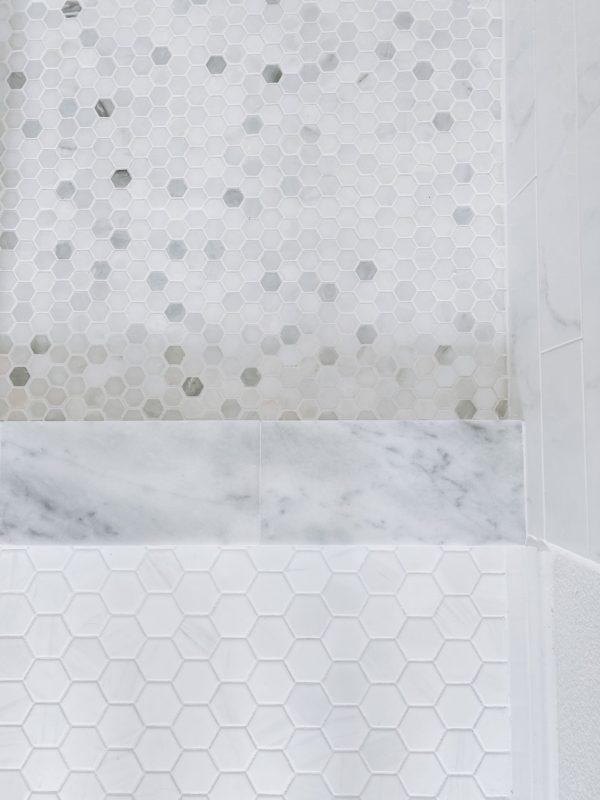
Tile Flooring
When it was time to choose our bathroom floor tile, there were so many styles, sizes, materials, and color options to choose from.
Thankfully, I knew I wanted something white with subtle grey marbling, which reduced my selection a bit.
And since I love the hexagonal tile flooring we installed in our guest bathroom, I knew I’d love that shape and size in here, too.
Ultimately, I chose this porcelain tile in a 2 x 2 honeycomb mosaic pattern. It has the slight gray veining and marble look I wanted, and it was super affordable.
I’m so happy with the clean look, especially when I remember what our bathroom floors looked like before!
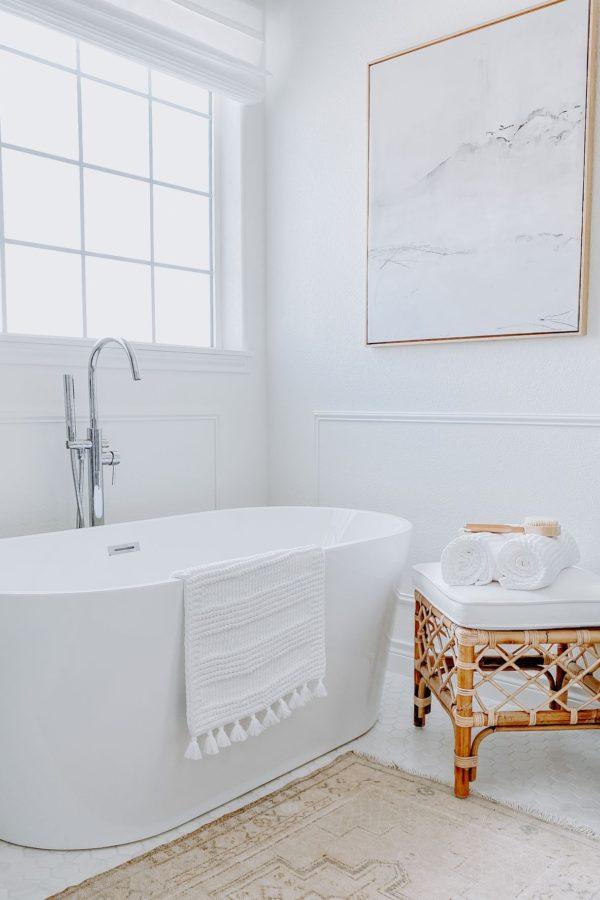
Bathtub & Tub Filler
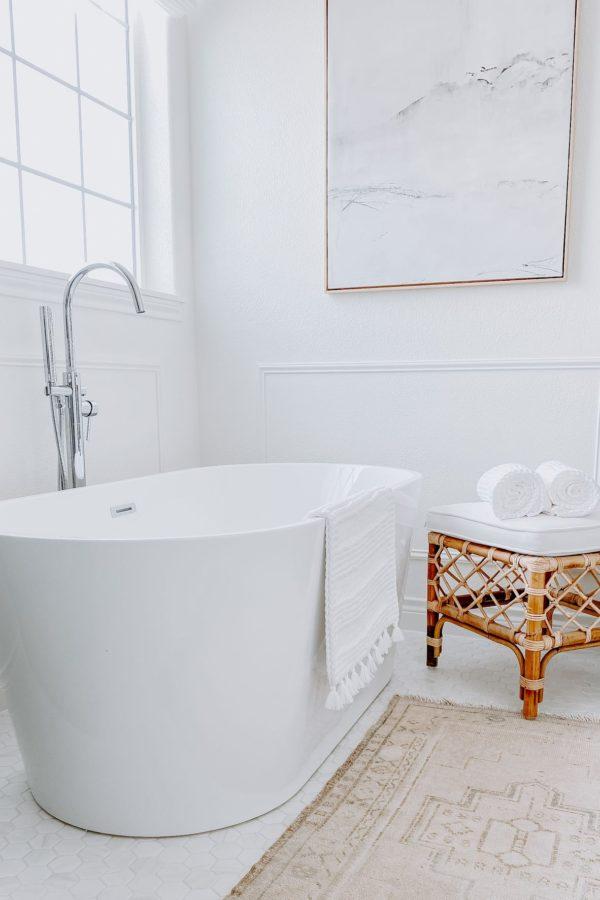
The freestanding bathtub was one of the easiest choices I made for this space.
Before we started this project, I had a picture in my mind of a white tub sitting under the window.
So when I saw this soaking tub at Wayfair, and it perfectly matched the vision I had in my mind, I knew it was the right one!
The tub filler was another easy choice.
We went with chrome finishes on the faucets and light fixtures, and soft brass on the cabinet pulls and mirrors.
See my post, A Simple Guide to Mixing Metals in the Bathroom, for more on mixing metal finishes in the bathroom.
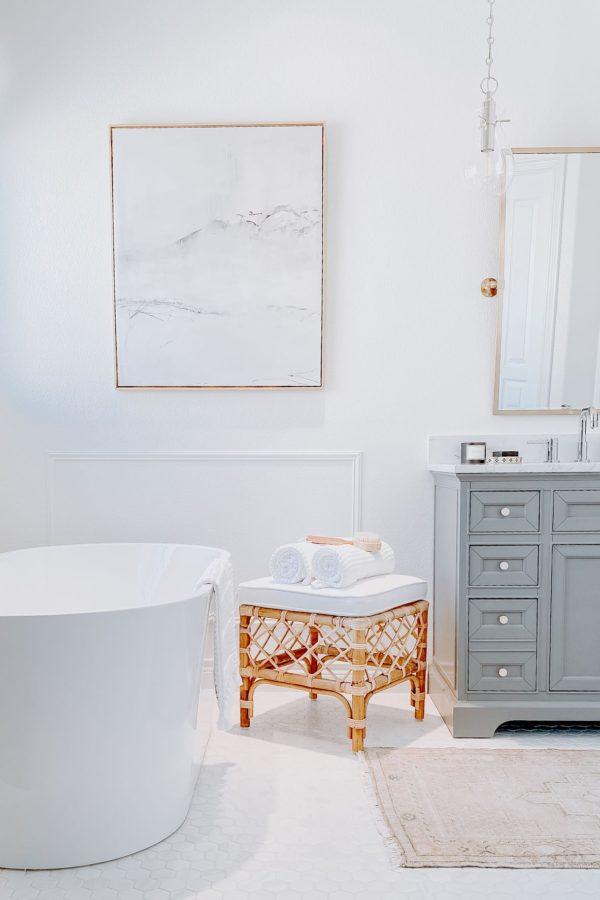
Ottoman/Stool
I’ve had this pretty stool in the back of my mind for years, knowing at some point I’d find the right space for it.
So, once our bathroom remodel got underway, I ordered it right away.
It adds the touch of warmth and natural texture this space needed and is the perfect spot to set my robe, towel, and book when I take a bath.
Bathroom Renovation Timeline
As far as the timeline for our bathroom renovation, we ordered the vanities and a few other things for our bathroom in late April and May, but my husband and son-in-law didn’t start demolition of the old bathroom until the beginning of June.
They began by tearing out the tub, vanities, mirrors, and all the floor tile.
They then tore out the shower wall and shower tile, which turned out to be a bigger job than expected, due to the mold.
By the way, because they kept our old vanities and corner tub intact during demolition, we were able to sell them on Facebook Marketplace, which was nice.
By mid-summer, supply chain issues started affecting delivery timelines for things like lighting, tile, and fixtures, so the project took a bit longer than we’d expected, but we were fine with using our guest bathroom, so we didn’t worry too much about waiting.
In late October, most of the plumbing was completed and we were able to move our stuff back in and start using the shower and toilet, but the new faucets and lighting weren’t delivered and installed until December.
I’m still trying different artwork and decor and making tweaks here and there, but I’m so thankful to finally have a fresh, bright, and peaceful space we can both enjoy.
I love that we were able to make our en suite feel like a whole new bathroom, giving it an entirely new look, while keeping the total cost low for a project of this size and staying within our budget.
This master bathroom project was a labor of love from start to finish, and I’m so grateful for my husband and sons-in-law. Their amazing diy skills and hours of work transformed our old bathroom into a space we’ll love for years to come.
If you have any questions regarding our diy master bathroom remodel, send me a message or comment below. xo Jane
Sources for our master bathroom remodel
Drawer pulls and knobs – similar
Marble mosaic tile – shower floor and niche
Shower head – alternate source – alternate source
Grout in “white” (we used the same grout on floors and shower)
Marble slab for shower curb
More bathroom sources
Bathroom Faucet Ideas

Bathroom Lighting Ideas
Bathroom Mirror Ideas
Cabinet Pulls and Knobs
Vanity and Linen Cabinet Ideas
For more bathroom remodel ideas and inspiration, you might be interested in these related posts from the blog:
A Simple Guide to Mixing Metals in the Bathroom
Beautiful Bathroom Design Trends, Styles & Decorating Ideas for 2024
Beautiful Bathroom Mirror Ideas for Every Style and Budget
Bathroom Design Ideas You Will Love
Planning Our Master Bathroom Remodel
Where to Find Affordable Turkish Oushak Runners and Rugs
Our Budget Guest Bathroom Remodel
How to Paint Bathroom Cabinets
Content might contain affiliate links. If you purchase through a link, I may receive a commission at no cost to you. Please see my disclosure policy for details.
6 Comments
Wendy
June 23, 2022 at 1:38 pmLove this remodel and appreciate all of your links!
Jane
June 24, 2022 at 9:14 amHi, Wendy! Thank you so much for your kind words! Have a beautiful weekend! xo Jane
Jennifer
May 3, 2022 at 3:14 pmI’m redoing a powder room and attempting to mix metals. I’m a bit stumped on the switch plate cover…the walls are green. Should I go with a metal, plain white or match the walls? I am clueless on design or decorating or what’s in/out.
Jane
May 4, 2022 at 1:58 pmHi Jennifer, I would suggest either painting your switch plate cover to match the walls or using a metal cover that matches one of the finishes in your space. Hope this helps! xo Jane
Anonymous
March 8, 2022 at 4:46 amYour bathroom is stunning!! It’s my absolute dream and I think I would spend a lot of time in there
Jane
March 8, 2022 at 12:15 pmThank you so much! Your kind words mean a lot to me. I do find myself spending more time in there than before! Have a wonderful day, xo Jane