
Good morning! If you saw my previous post all about our guest bathroom remodel, you’ll know we recently updated our small guest bath on a budget, which included painting our old bathroom vanity cabinet.
I’ll have to be honest, I was pretty nervous about painting our bathroom cabinets and initially considered tearing out the old vanity and buying a new one. Thankfully, I got over my hesitation and gave it a try, because this project turned out to be much easier than I expected!
Since I found this project so satisfying, I wanted to write this separate post sharing my step-by-step tips on how to paint bathroom cabinets. After reading this post, I hope you’ll have the confidence and encouragement to paint your own bathroom cabinets!
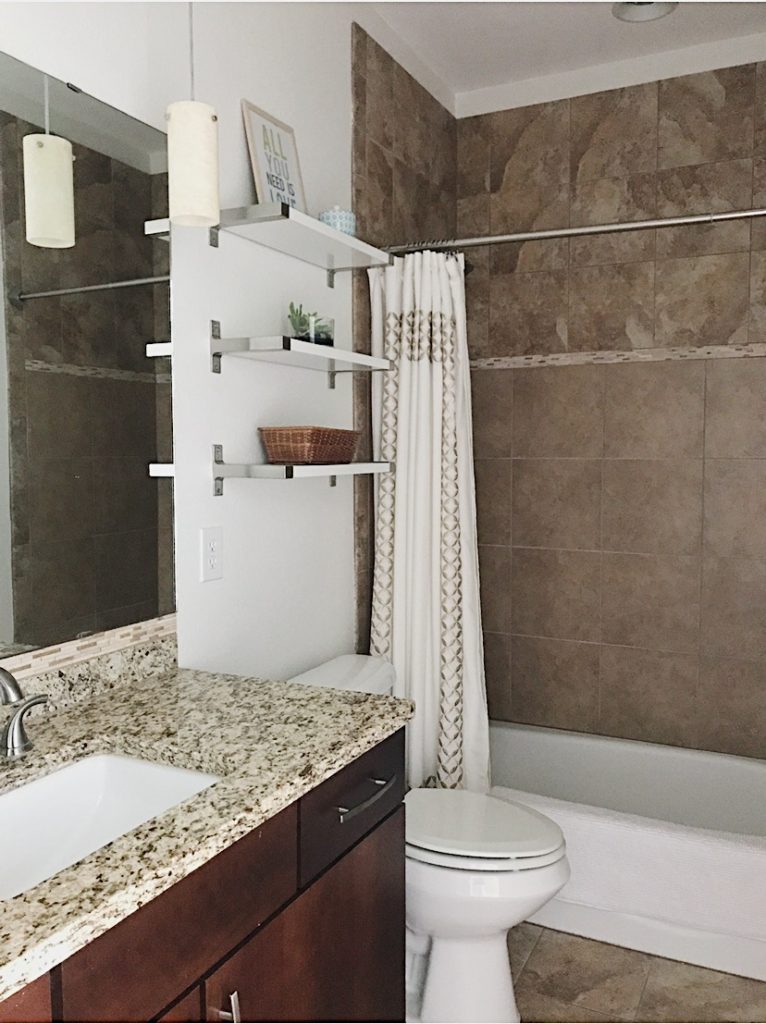
Before we get started, here’s what our guest bathroom looked like before:
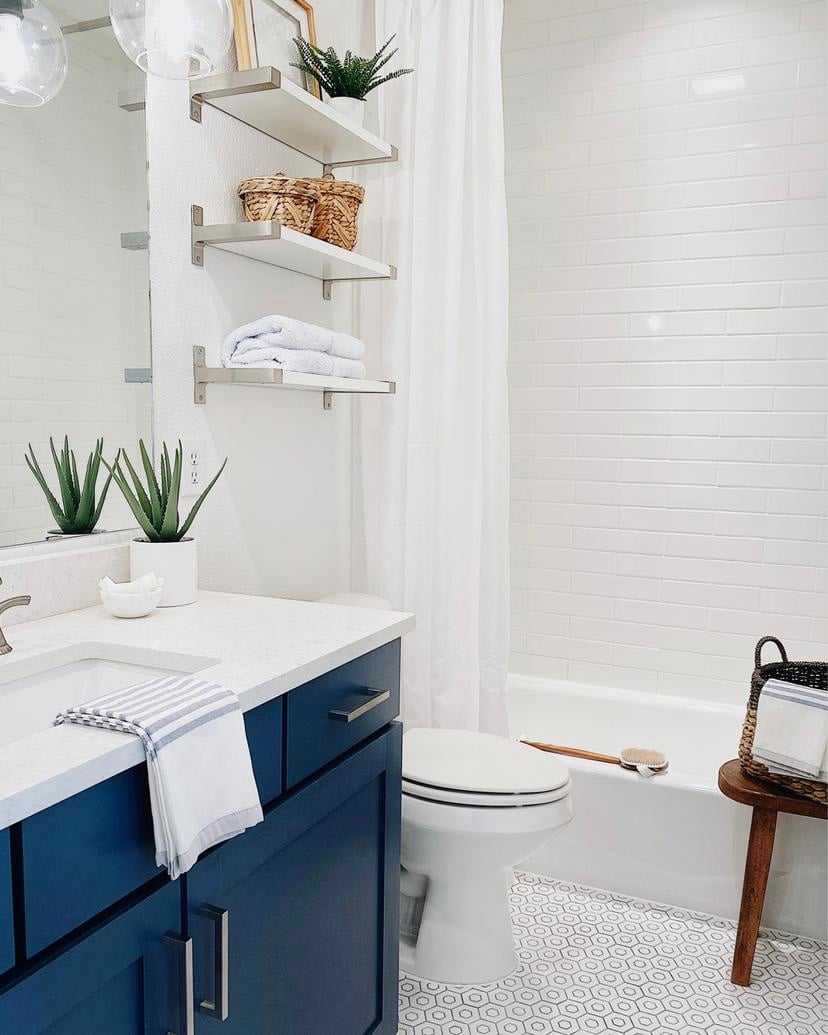
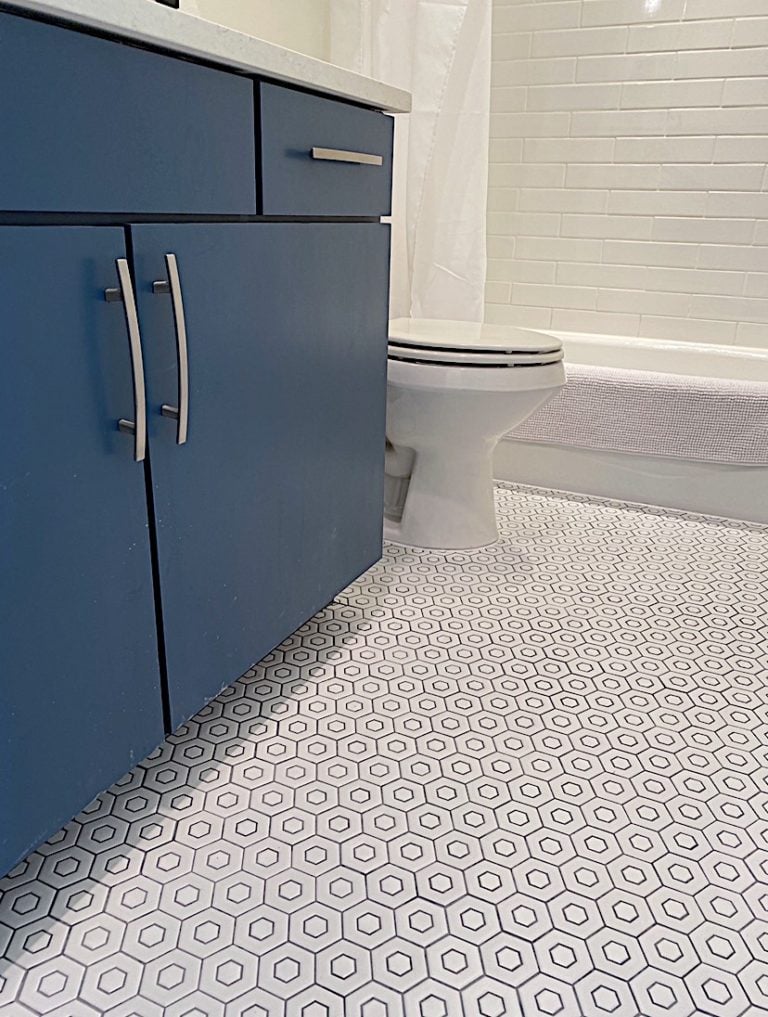
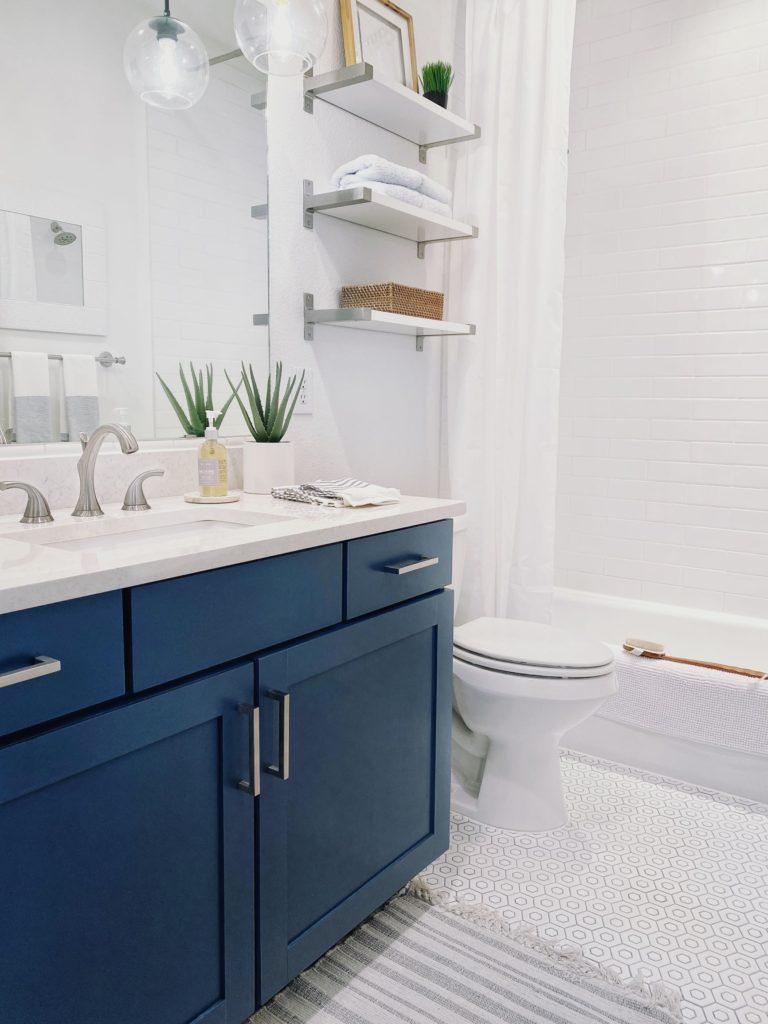
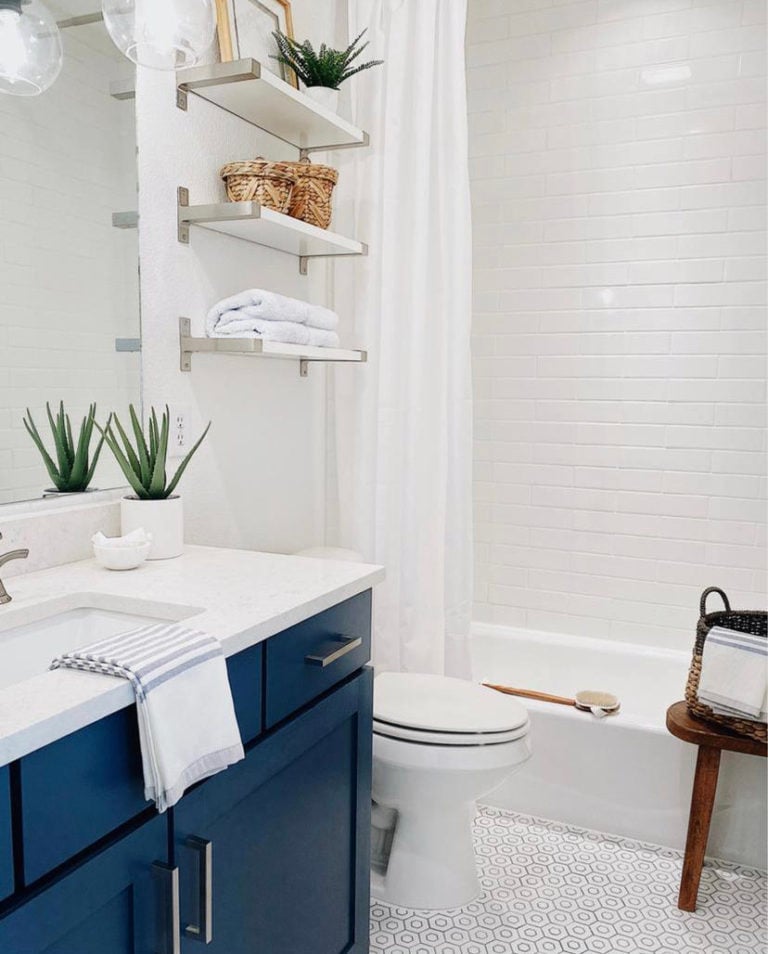
And here’s the after–I love walking in this room now. It feels so much lighter and fresher!
Bathroom Sources:

How to Paint Bathroom Cabinets
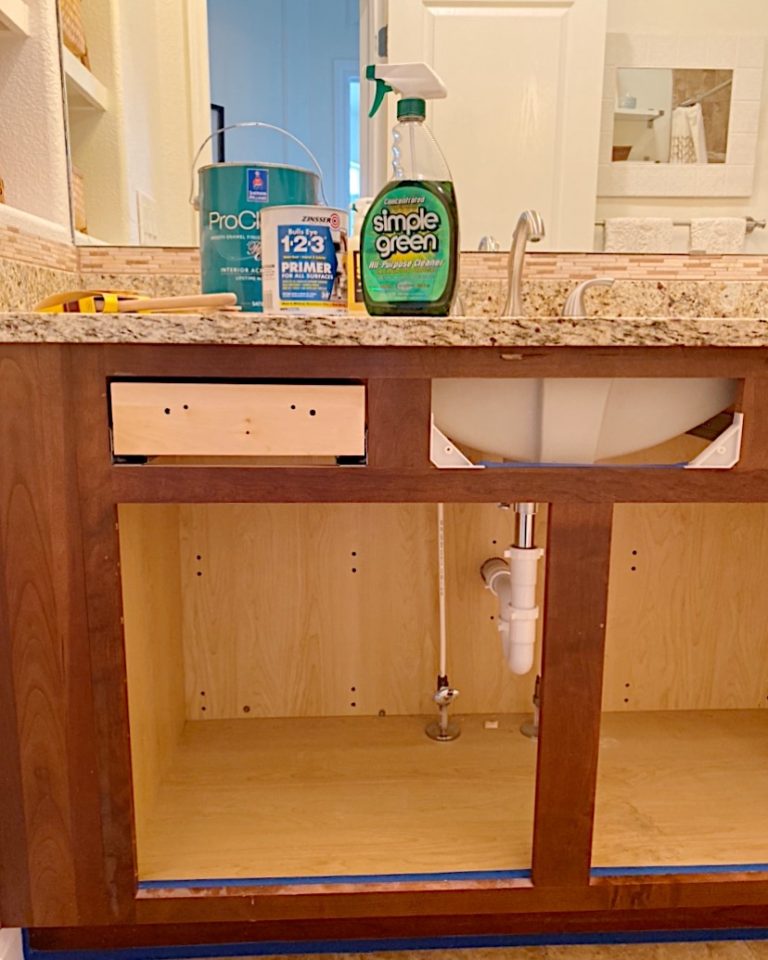
Step 1: Remove all hardware and vanity doors and drawers.
Remove all hardware, doors, and drawer fronts. If you can’t remove the drawer fronts from the drawers, simple pull out the entire drawer.
Make sure to bag and label the hardware you remove so you know what goes where when you put everything back together!
Step 2: Set Up an Area to Paint
If you live in a cold climate and it’s winter, you don’t want to be painting in a cold garage because your paint won’t cure. Besides, it’s no fun painting by yourself in a cold garage! I suggest setting up somewhere where it’s warm and you have plenty of light.
My favorite spot to paint is in our entryway, because it has a tile floor for easy clean-up, great natural light, and it’s not too far from the coffee maker! 🙂
I put some newspapers or a drop cloth on the floor and set up something to lay all the cabinet doors and drawer fronts on. This time, I was lazy and just used a bunch of up-ended boxes. It actually worked well because the doors hung over the edges of the boxes, making it easier to prime and paint the sides.
While I work, I like to put in my air pods and listen to an Audible book (or a YouTube video of someone reading a book).
Step 3: Clean All Surfaces
Start by cleaning all surfaces you’re going to paint to remove dust, grime and oils. I used Simple Green.
For a non-toxic option, you can use a a tablespoon of borax, mixed in a gallon of lukewarm water with a wood paint stirrer.
You can also use TSP cleaner mixed in warm water and applied with a clean cloth. However, TSP cleaner requires precautions when using it, which is why many people turn to a substitute.
Make sure to use gloves and eye protection when using TSP.
Step 4: Fill Holes (if necessary)
If you plan to change your cabinet hardware and the new hardware will require new holes, you’ll need to fill the old holes with wood filler. Also fill any scratches, gouges, or dents in the wood.
You can just apply the wood filler with your finger, and wait for it to dry. You want to apply too much rather than not enough. Once the wood filler dries, lightly sand it until the surface is smooth.
Step 5: Sand (if necessary)
Wondering if you have to sand before painting your bathroom cabinets? That depends on the surface of your cabinets.
If you’re painting a very smooth, matte surface (like ours), then you can probably paint your bathroom cabinets without sanding. I gave our cabinets a quick once-over with these hand pads and they worked great.
However, if you have a rough or glossy surface, sanding is important because it helps your primer and paint adhere.
You don’t have to go crazy with sanding. Just run your sandpaper or hand pad over all the surfaces you’re going to paint, including the vanity frame, doors, and drawers.
After sanding, make sure to thoroughly clean the dust off with a clean microfiber cloth. You might even want to do another wipe down with Borax or TSP to make sure there are no dust particles remaining on the cabinet surfaces.
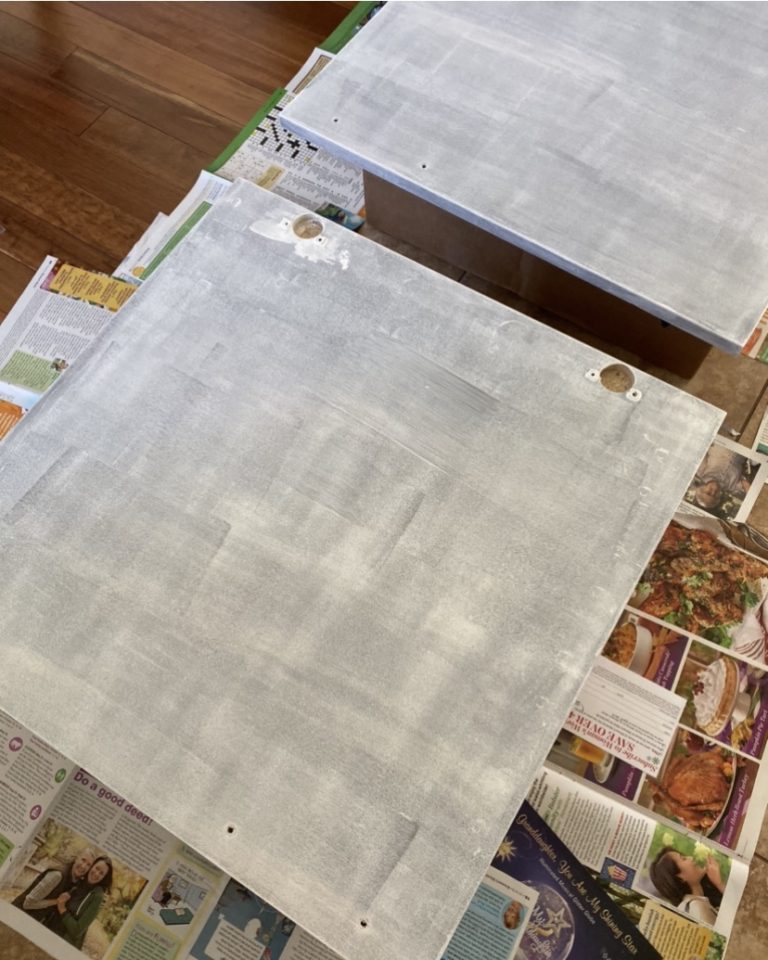
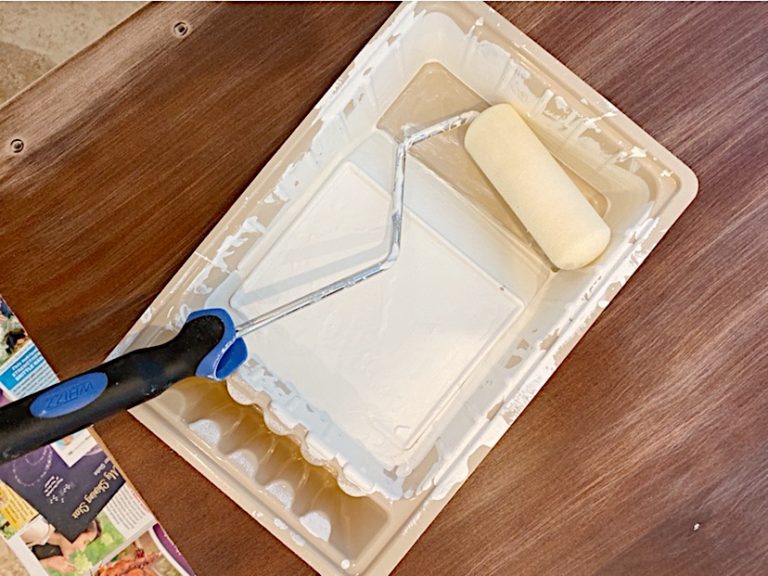
Step 6: Prime
The next step is to apply a good paint primer. I used Zinsser Bulls Eye 123 Primer which is made for adhering to all types of surfaces. I bought a quart and only used about 1/3 of the can for the entire vanity.
Start by priming all the drawer and door backs with a foam roller.
When using a foam paint roller, be careful to not overload your roller with paint or press too hard. If you do, you might end up with bubbles or streaks. (If this happens, re-sand & clean the surface and begin again.)
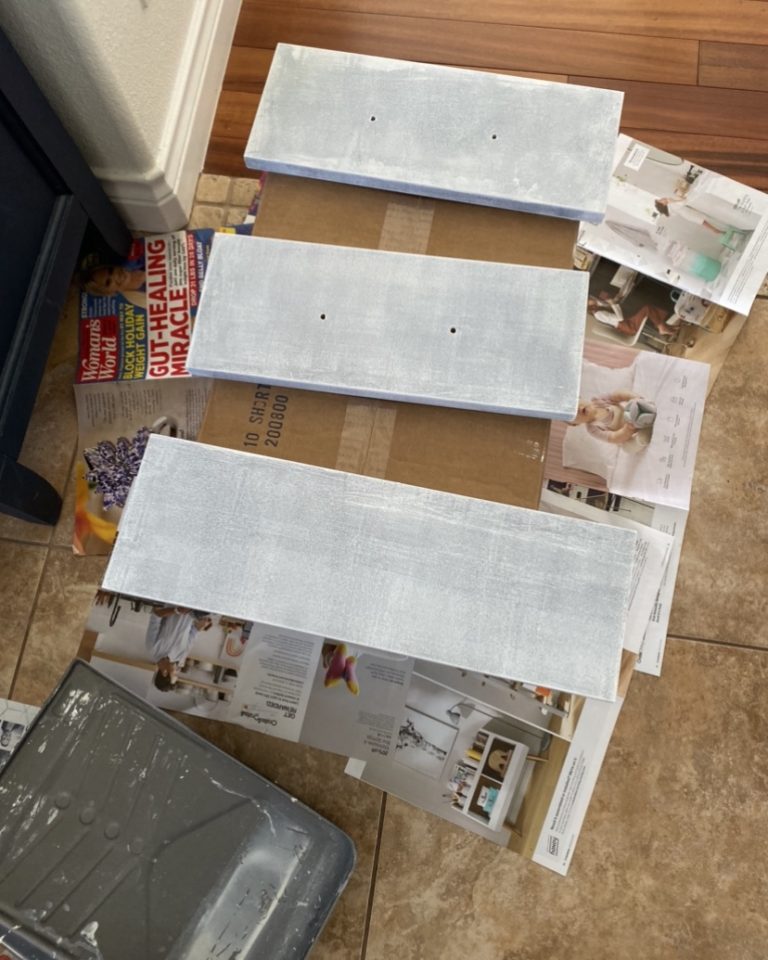
Once they’re dry, flip the doors and drawers over and apply a thin coat of primer to the fronts and sides.
Don’t forget to prime your vanity frame, too. I used a combination of the foam roller and a small trim brush to apply primer to the vanity.
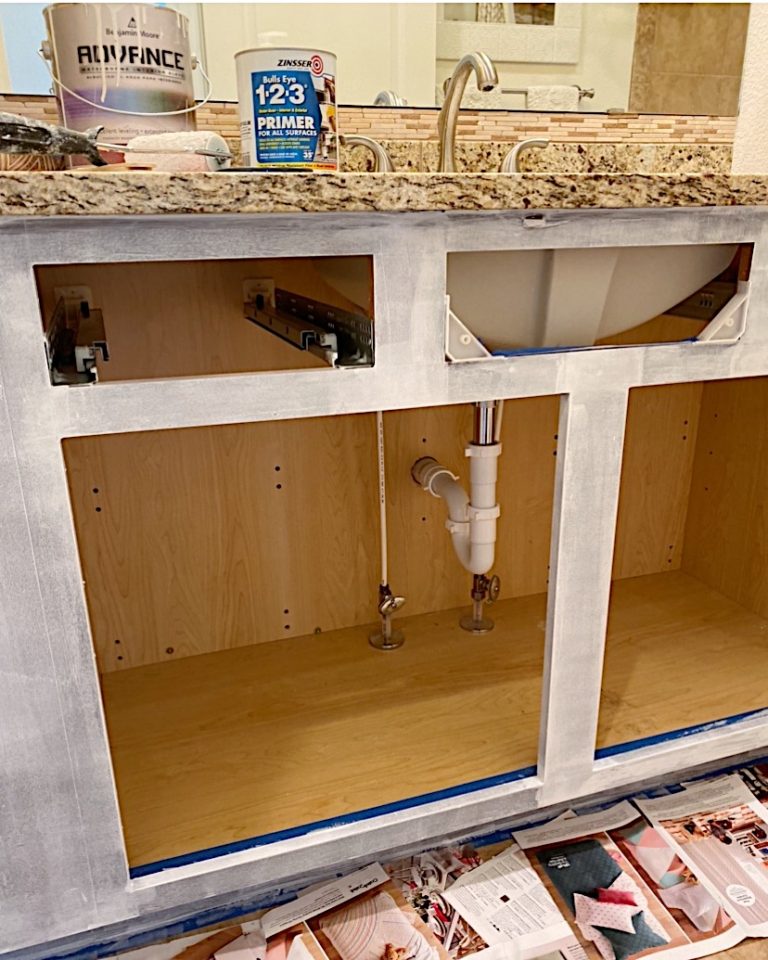
Ideally, let the primer dry overnight before painting.
Step 7: Paint
We’ve finally arrived at the main event: painting! Follow the same steps as priming, this time using your chosen cabinet paint.
What’s the best paint for vanity cabinets?
I recommend using a water-based, alkyd paint. You won’t need a top coat if you go this route.
I did some research online and decided to go with Benjamin Moore Advance Satin Latex to paint our vanity.
In my opinion, latex is the best paint for bathroom cabinets because it’s easier to clean-up and has faster drying times and less chemical smell than other types of paint.
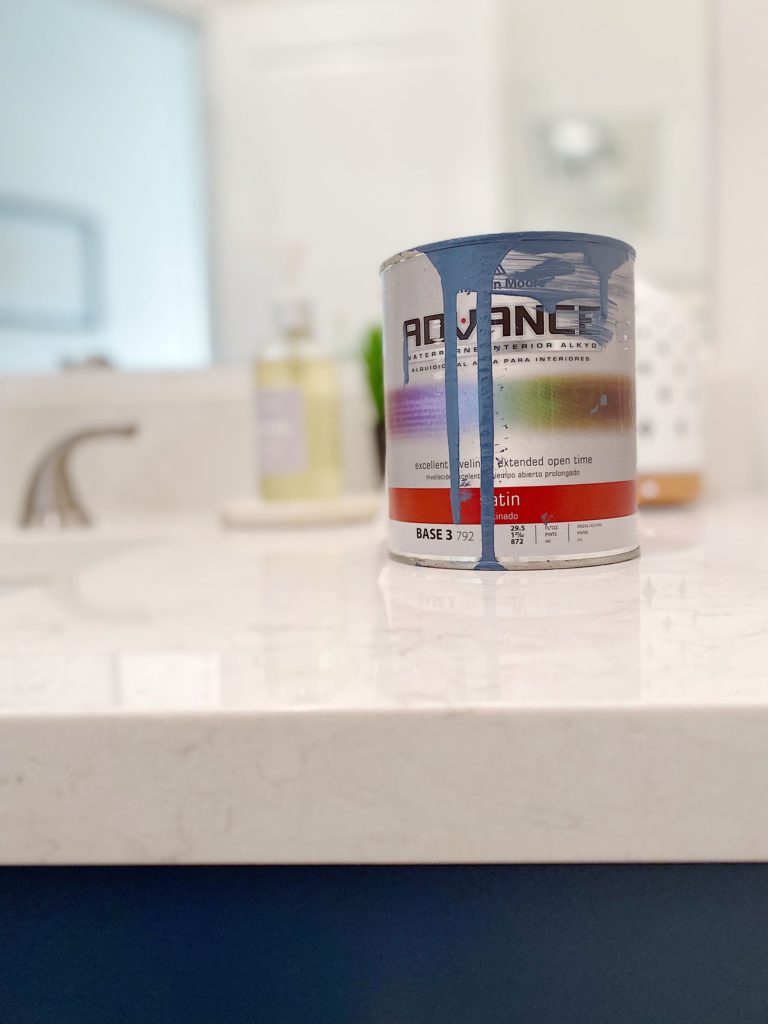
Benjamin Moore Advance is a special type of paint made specifically for cabinets. It has a harder finish than typical paint and has self-leveling capabilities.
I bought a quart and used less than half of the can.
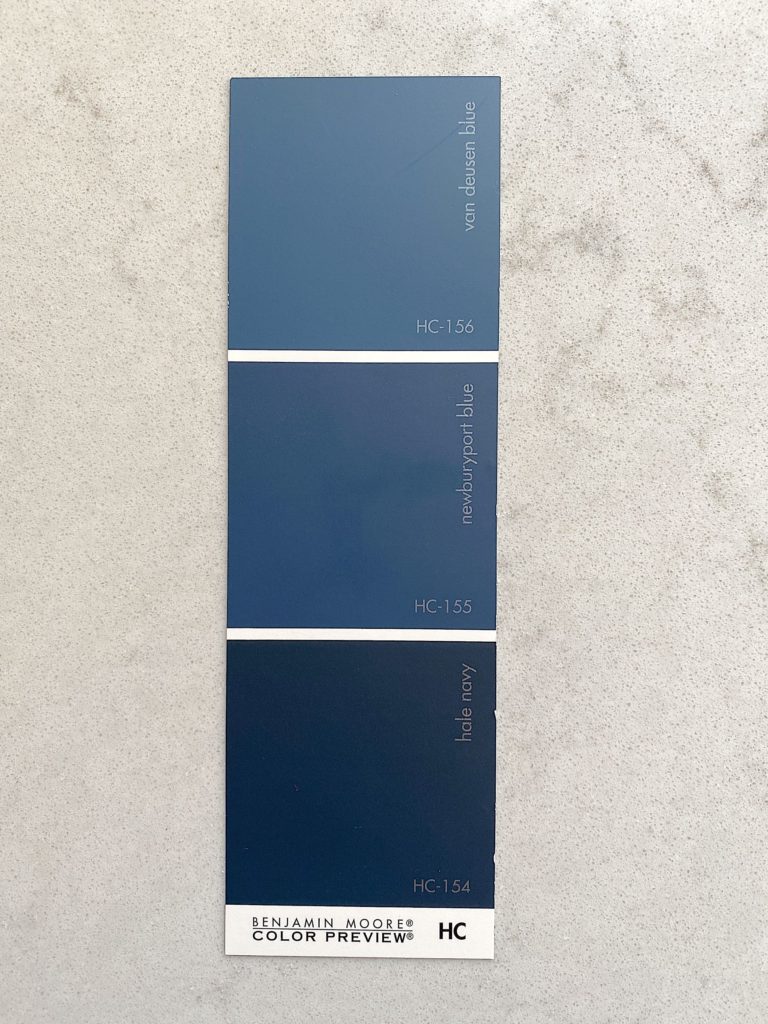
As for the blue cabinet color, initially I planned to use Benjamin Moore Hale Navy, HC-154.
But when I got to the hardware store, I changed my mind and went with a lighter shade from the same paint swatch, Benjamin Moore Van Deusen Blue, HC-156.
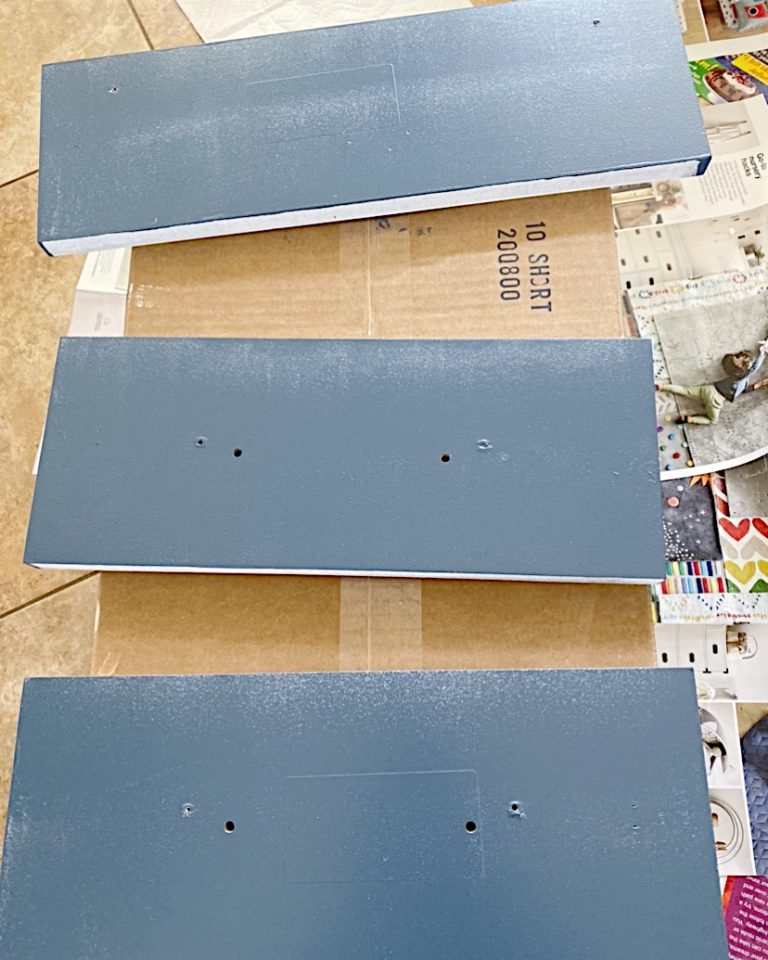
These are the backs of the drawers–as you can see I just painted over the labels since they don’t show once they’re reinstalled.
I recommend going with either a satin or semi-gloss finish for the bathroom, as it makes it easier to wipe down. I used satin.
Again, I used foam paint rollers to paint the doors and drawers. And for the vanity frame and trimwork, I used my favorite angled trim brush.
Don’t forget to pick up several foam rollers and dispose of them as they get overloaded with paint. You’ll also need a roller frame and a paint tray.
Step 8: Lightly Sand (if needed) and Apply a Second Coat
Once you have a coat of paint on the vanity frame and the front and back of the vanity doors and everything is thoroughly dry, lightly sand any areas that have bubbles or drips, remove all sanding dust, and apply a second coat of paint to all surfaces.
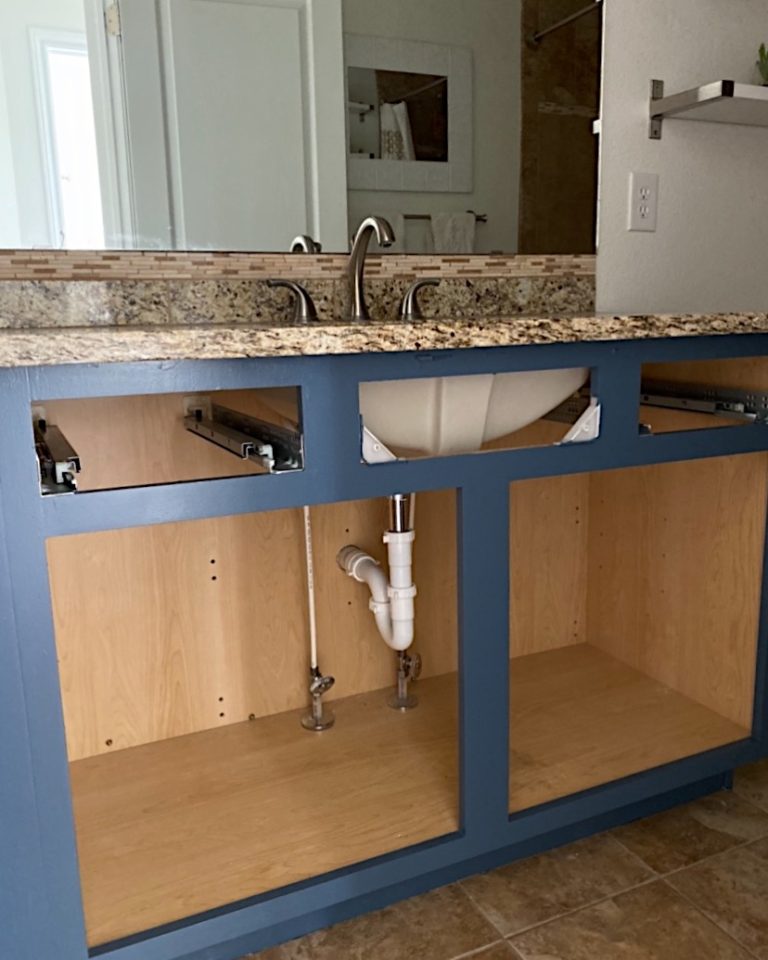
Step 9: Reinstall Your Cabinet Doors and Drawer Fronts
After the second coat of paint, give the doors and drawer fronts at least two or three days to dry before reinstalling them.
It can take a week or two for paint to completely cure, so be careful around your vanity for the first couple weeks.
If you’re adding new hardware, drill the new holes before reinstalling your doors and drawers.
To make our flat-front doors look a bit more Shaker-style, we also added square trim, using inexpensive 1/4″ thick furring strips from Lowe’s.
After priming and painting the strips, Dave cut and installed them on the front of the cabinets with glue and brad nails.
guest bathroom sources:
That’s it! If you have any questions regarding how to paint bathroom cabinets or our guest bathroom remodel, send me a message or leave a note in the comments! xo Jane
For more bathroom renovation ideas and inspiration, you might be interested in these related posts:
A Simple Guide to Mixing Metals in the Bathroom
Beautiful Bathroom Ideas, Design Trends and Decor for 2024
Our Master Bathroom Renovation
Bathroom Wall Mirror Ideas for Every Style and Budget
Beautiful Bathroom Design Ideas You’ll Love
Content might contain affiliate links. If you purchase through a link, I may receive a commission at no cost to you. Please see my disclosure policy for details.
10 Comments
Kay
January 3, 2023 at 1:56 pmHi Jane – your bathroom cabinets are gorgeous! Love the rich contrast of the rich, dark blue against the white walls.
We have also painted our bathroom cabinets a light, warm cream colour, which I have loved, but find that the opening the doors frequently the paint has worn off. Have you run into that issue?
Is there a stain or something you’d recommend I can apply on top?
I just came across your site today and loved your article “8 Tips for Styling Surfaces in Your Home” ; I loved your practical ideas especially the ones noted under point #7 (Have Fun)
Jane
January 4, 2023 at 8:53 amHi Kay — Thank you so much for your thoughtful comment and kind words! We haven’t had a problem with the paint wearing off of our bathroom cabinets; however, since it’s a guest bathroom, it doesn’t get a huge amount of use. I do think the brand and type of paint we used helped a lot. I know some people recommend Minwax clear Polycrylic as a final step to painting cabinets, so that might be an option for you — but I would test it in an inconspicuous place first to make sure it doesn’t change the color or sheen of your cabinets. I hope this helps.
Again, thank you for reaching out, and I’m so glad you enjoyed my styling post, as well! xo Jane
sara b
December 7, 2021 at 4:52 pmwow! I am doing the exact same thing at the .oment! I bought the hale navy but think it may be too dark now and may get the blue you chose. Also, what color is your wall?
Jane
December 8, 2021 at 7:43 amHi Sara! Our bathroom walls are painted with Simply White by Benjamin Moore. I wish you all the best with your painting project! xo
Darcy
November 23, 2021 at 10:09 amBeautiful!! Did you also replace the granite countertops?
Jane
November 24, 2021 at 4:24 pmThank you so much, Darcy! Yes, we replaced the granite countertops with quartz ones from Lowe’s. Let me know if you have any more questions! xo Jane
Anonymous
April 7, 2021 at 4:28 amI love your cabinet. Can Formica cabinets be painted? If so what kind of paint would you use?
Thanks Debbie
Jane
April 8, 2021 at 2:26 pmThank you for your kind words, Debbie! I’ve never painted Formica cabinets before, but apparently they can be painted! Here’s an article I found from Bob Vila covering this topic: https://www.bobvila.com/articles/how-to-paint-formica/ I hope this helps! xo Jane
Mira
February 6, 2021 at 5:05 pmBeautiful! I am debating on painting my guest bathroom cabinets. They are Formica and I’m not sure they would take the paint like yours did. What kind of countertop did you use? It certainly brightened the room. It is lovely.
Jane
February 7, 2021 at 8:44 amHi Mira, thank you so much! We added a quartz countertop from Lowe’s. Have a wonderful day! xo