It’s taken me a while to put together a post about the recent updates we made to our guest bathroom, but I’m excited to finally share all the details on this small full bathroom remodel, including how we kept the cost low, what we did, and what we wish we would have done differently!
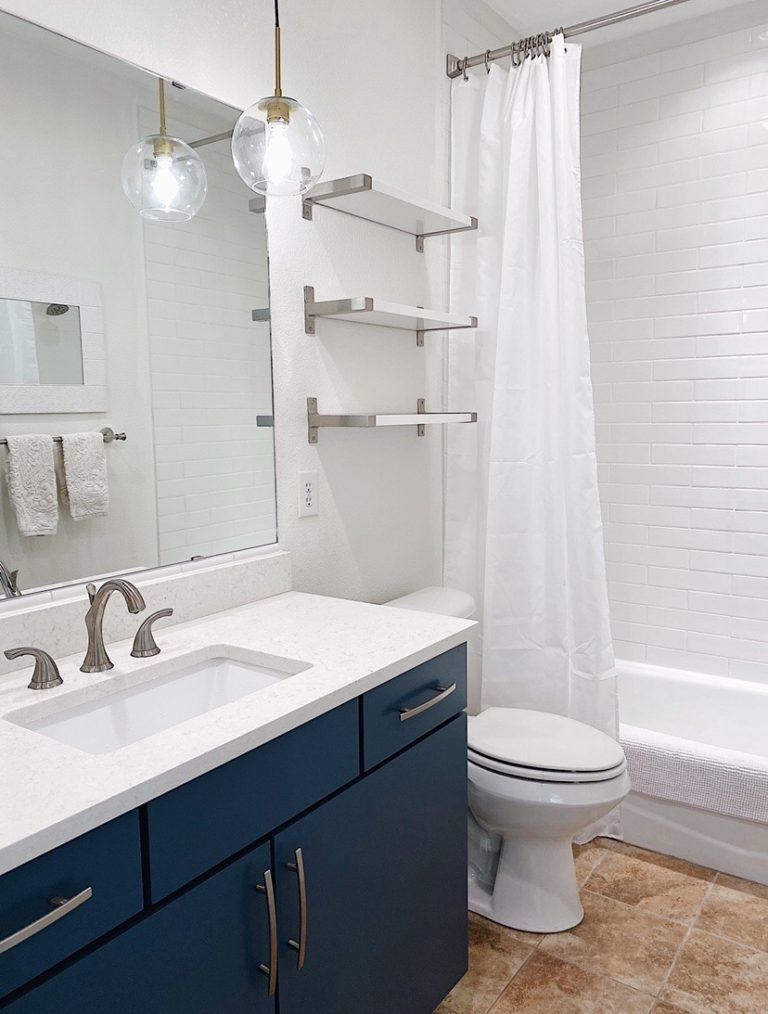
The “before” version of our guest bathroom is a pretty common look, since those brownish-tan tiles and gold granite countertops were very popular with home builders a few years ago.
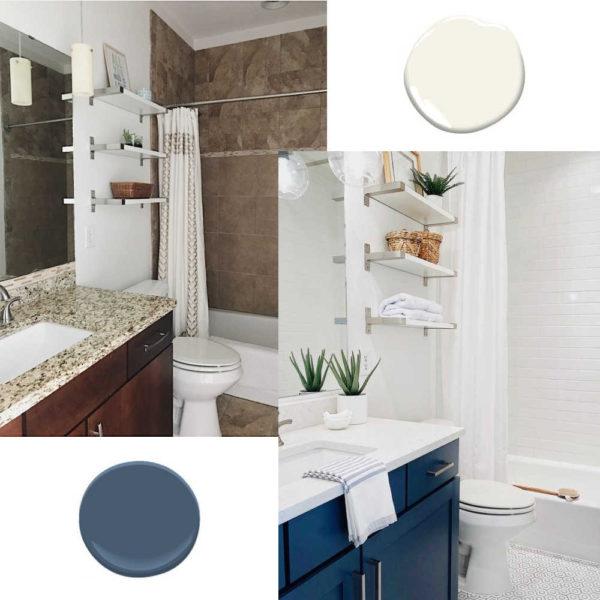
But the combination of the tan floor tile and bath tiles, cherry wood vanity, and gold granite countertop was just too dark for me. With no windows in this small space, it truly felt like a cave when you walked in here.
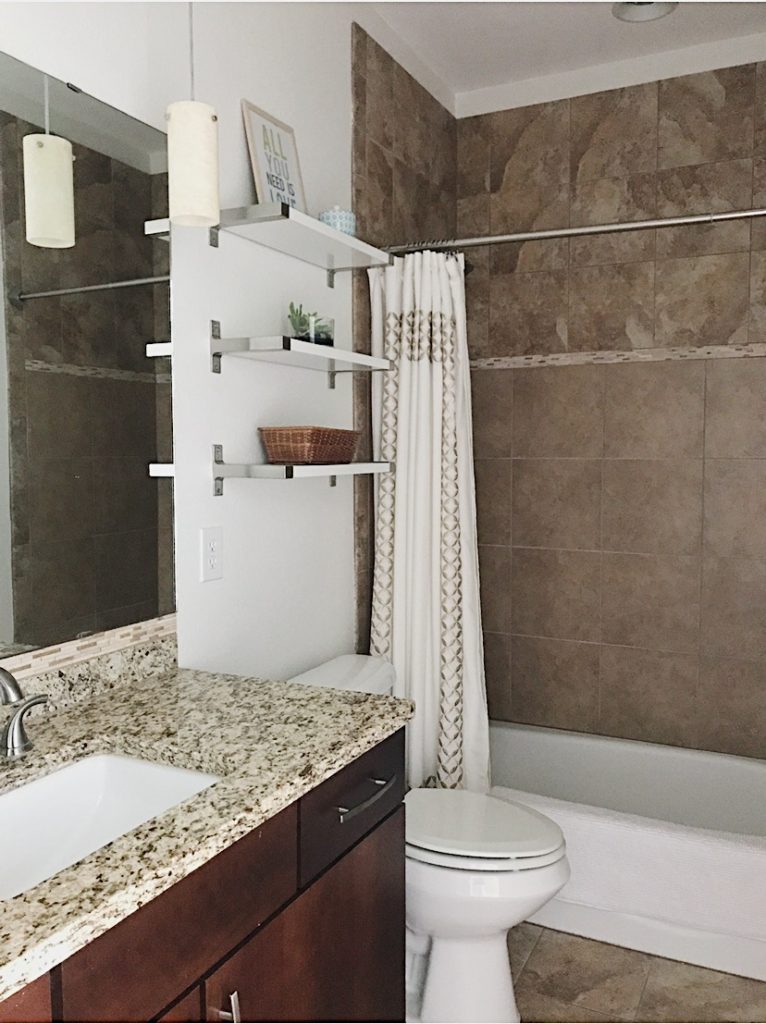
Actually, this bathroom was even darker before, because the walls used to be beige, too! However, I painted them white a couple of years ago, with Simply White by Benjamin Moore, which made a huge difference.
Here’s a look at the after:
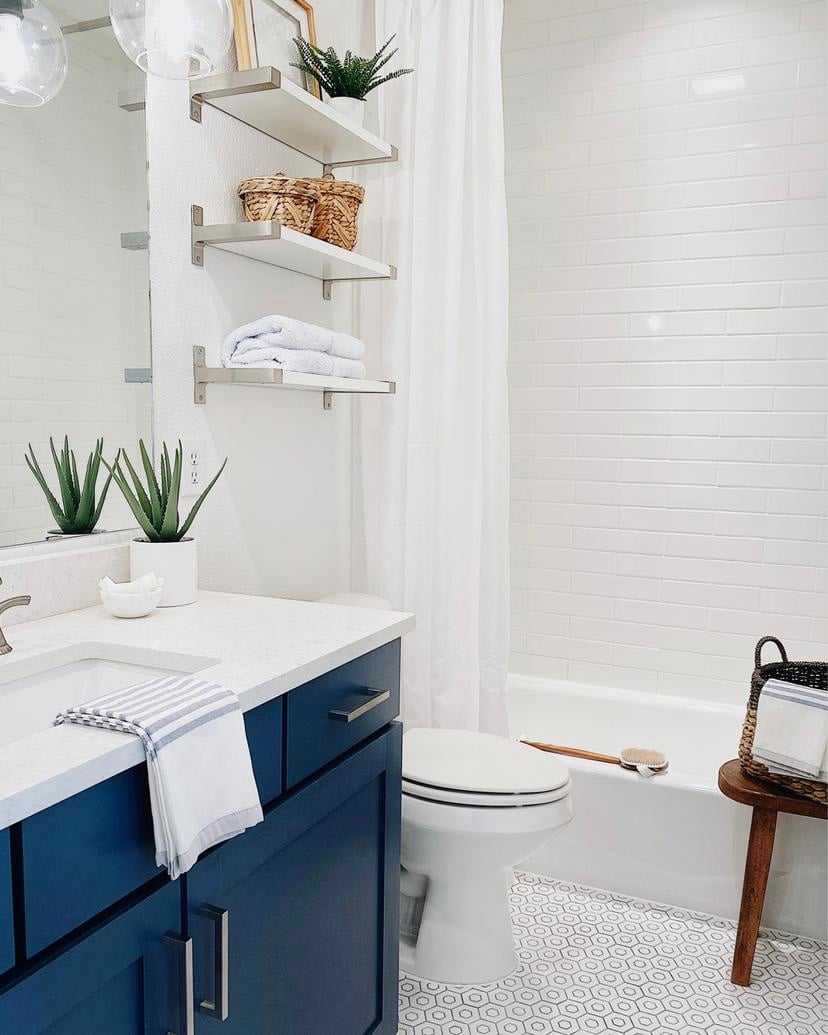
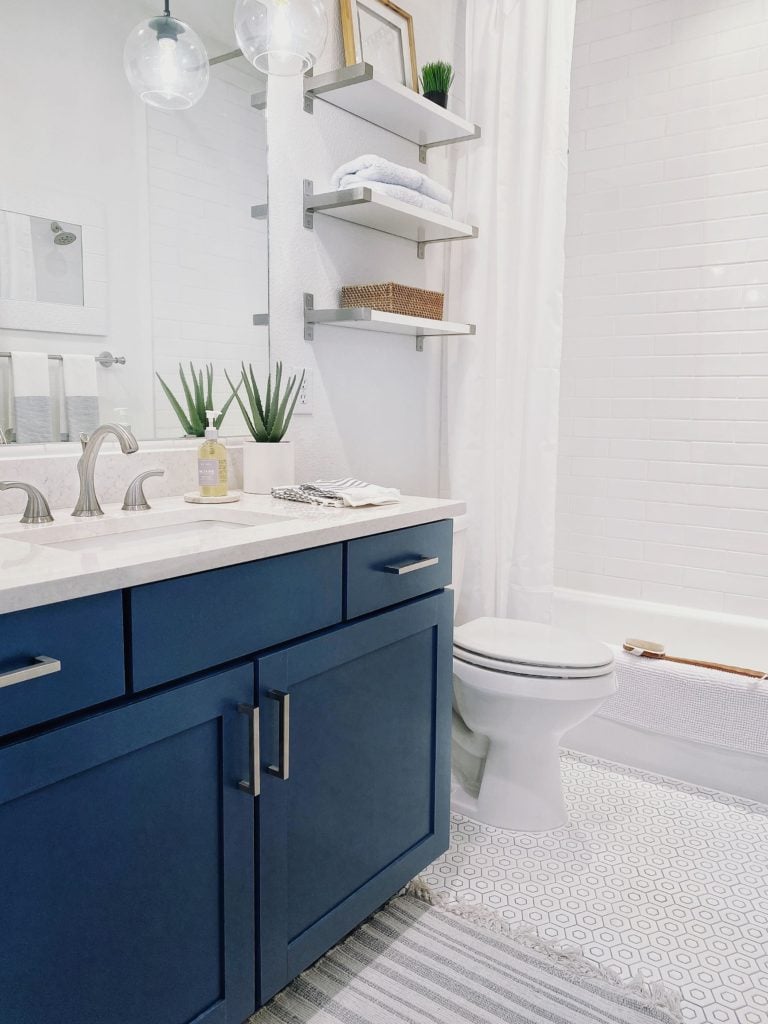
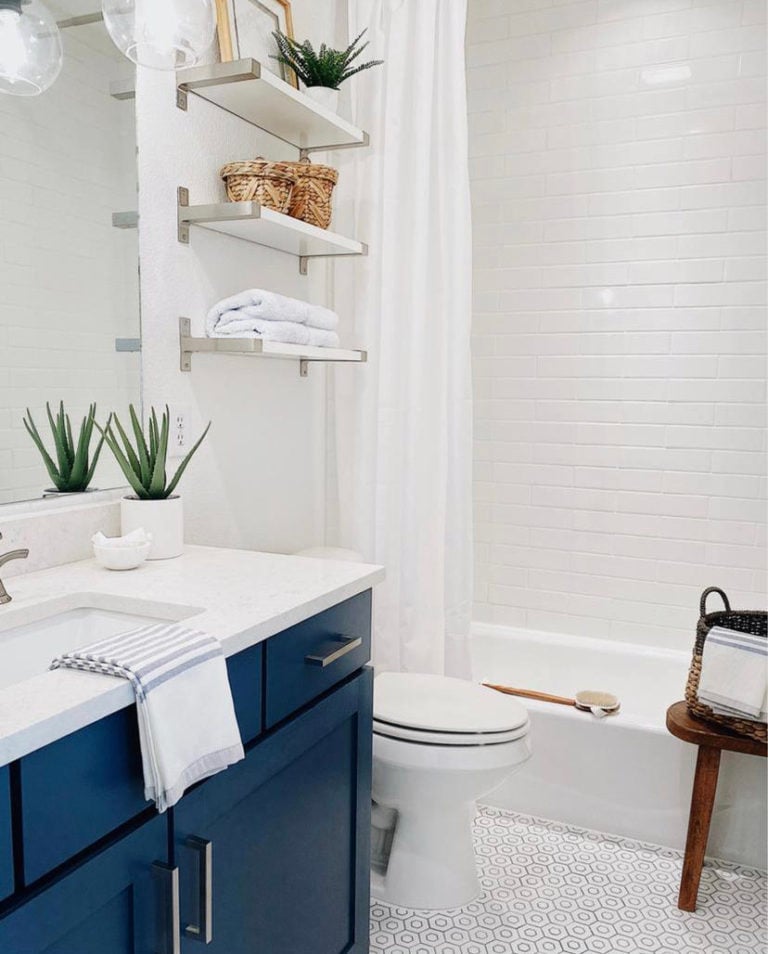
I love the lighter, brighter feeling of this small bathroom now. It’s been transformed from the darkest room in our house to the brightest!
Our Small Full Bathroom Remodel
To stay within our budget (which was originally $1000, but we ended up spending closer to $1200), we kept the original bathroom layout and reused the same vanity, toilet, tub, mirror, shower head, towel bars, and faucets.
I might eventually add new faucets in here–I’m amazed the ones we have are still in such good shape after 11 years!
By the way, these are the Bergshult shelves from IKEA, attached with the Granhult brackets.
1. Paint the bathroom vanity
The first thing we did was add a fresh coat of paint to the vanity, with Van Deusen Blue by Benjamin Moore.
If you remember, when we remodeled our kitchen, we paid someone to paint all the cabinets.
They came in, taped off everything, removed the old hardware, cleaned all the cabinets, did a light sanding, primed, painted, took our cabinet doors and drawer fronts to their shop to spray paint, and then installed them, along with our new pulls, just a few days later. It was wonderful!
But, as I said, this was a budget bathroom renovation, so to keep our bathroom remodel cost down, I decided to give painting the cabinets a go.
This was the first time I’d attempted painting cabinets, but I figured if it didn’t turn out, I would just have to squeeze the cost of a new vanity into our budget.
Thankfully, I was surprised at how easy it was to paint our vanity–and how well it turned out!
If you’re thinking of painting your bathroom cabinets yourself, it’s a great way to save money. See this post for my step-by-step instructions on how to paint bathroom cabinets.
2. Add new light fixtures over the vanity
Next, we replaced the old vanity lights with these globe pendants. I ordered them in the brass finish because I planned to eventually change the cabinet hardware and faucets to brass.
Later, I decided not to go with brass in here, so we painted the metal & plastic parts of each light fixture with matte black spray paint.
I’m so glad we added the new light fixtures early on in the remodeling process because they added much-needed light to this space, making our job a little bit easier as we tackled the rest of the projects in here.
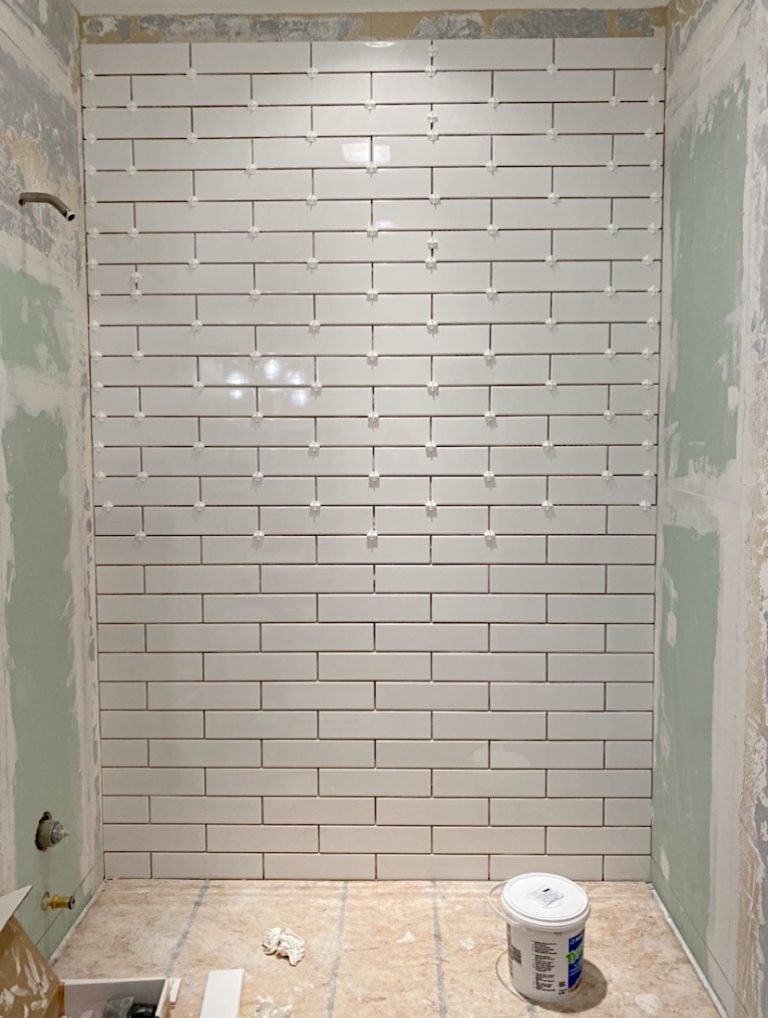
3. Remove the old bathroom tub tile and install subway tile
Initially, I planned to paint the brown tiles in the tub surround with this product. However, after reading all the warnings regarding fumes, etc., Dave offered to remove the old tile and replace it. (Yay!)
For the tub surround, we went with classic white subway tile from Home Depot, an easy and budget-friendly decision. I did choose a longer, 12″ version for a slightly different look.
I wanted a clean, all-white look, so I went with sanded grout in “White.”
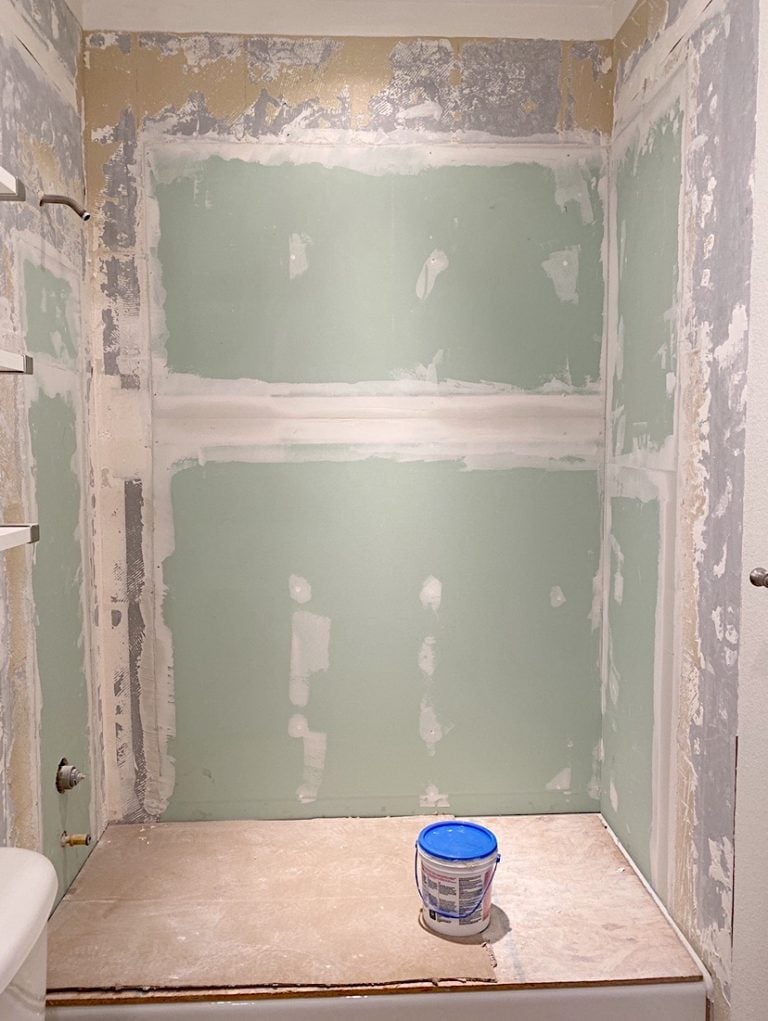
Dave, with his amazing DIY skills, had the old tiles out within a couple of hours, but some of the tile was permanently attached to the wallboard, so he ended up pulling out all the old backer board and installing new.
This added an extra day to the project, since he had to tape, mud and sand before he could start tiling.
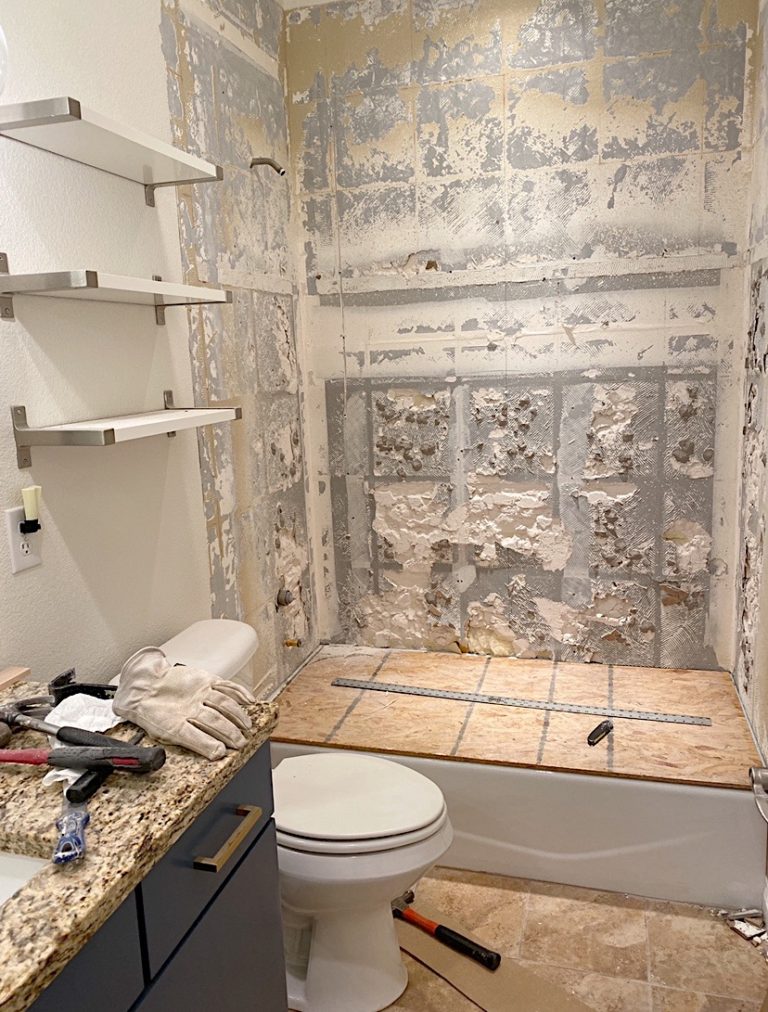
It’s a good idea to cover the tub with a piece of plywood so it won’t get damaged during demolition.
4. Replace the old countertop and sink
I knew I wanted a white quartz countertop for the vanity, so I went to the kitchen and bath department at Lowe’s and ordered a custom quartz countertop and sink.
Since the vanity top is only about 5′ long, we picked it up at the store and Dave installed it himself, saving us quite a bit of money in labor costs.
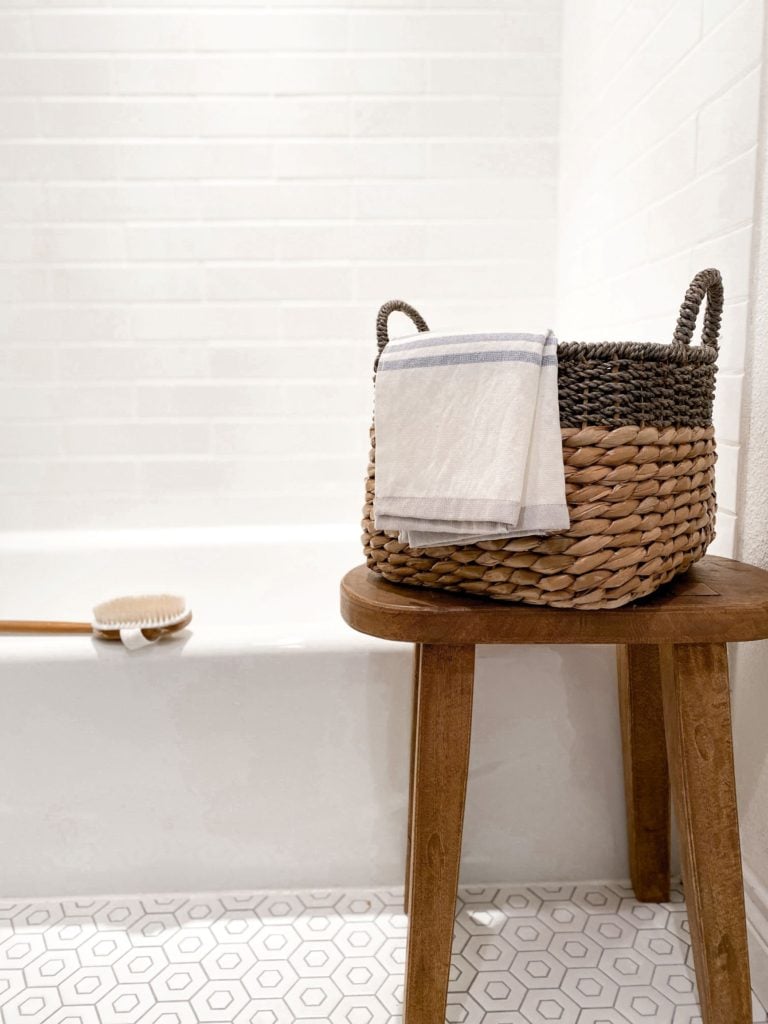
5. Tear out old bathroom floor tile and add new ceramic tile
I also initially planned to paint the floors in here, and purchased this stencil for the job.
However, after Dave finished the tub surround, and we saw how great the new tile looked, we decided to also remove the old flooring and lay new tile.
I’m so happy we went this route, but I have to admit I’m curious as to how the stenciled floor would have looked.
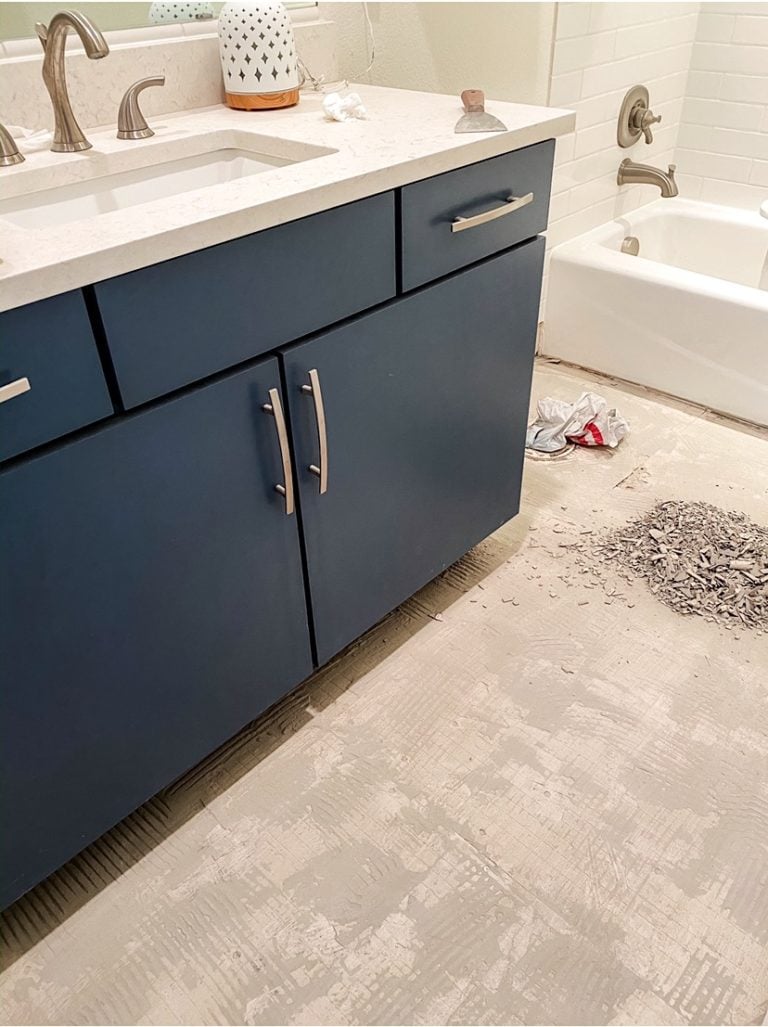
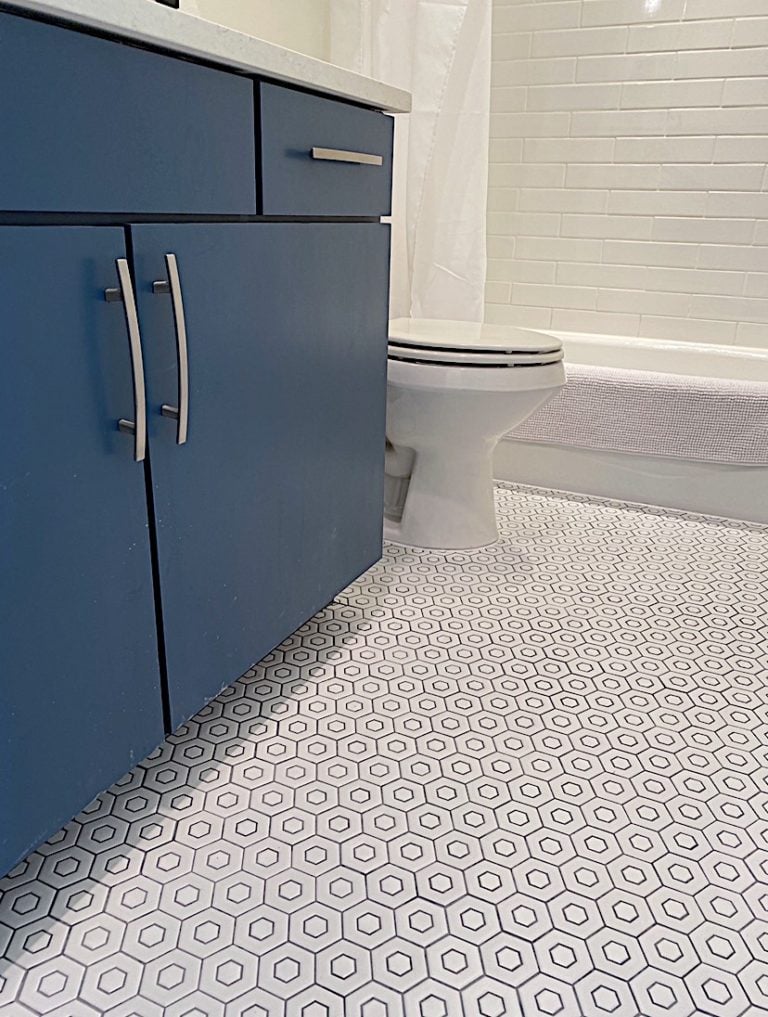
The floor tiling part of the project took place during the first week of lockdown. Dave had a bit more free time and was ready for a project, so I ran to Lowe’s one day, feeling weird about being out and about.
Normally, I would have hung around in the tile aisle forever, trying to make the perfect choice. But this day, I grabbed the first tile I saw that I liked (I knew I wanted something geometric), along with grout and mortar, and left.
Maybe it was a good thing I was forced to make a quick decision, because I ended up loving the tile I chose. It made such a huge difference and helped tie the entire bathroom together.
Dave, on the other hand, wasn’t too thrilled about grouting around and inside all those tiny tiles–so it’s probably not a choice I would make again!
6. Add trim to the vanity cabinet doors
The very last part of our diy bathroom remodel was adding trim to our formerly-flat cabinet doors to make them look more like Shaker-style bathroom cabinets.
First, I bought inexpensive 1/4″ thick furring strips at Lowe’s and primed & painted them.
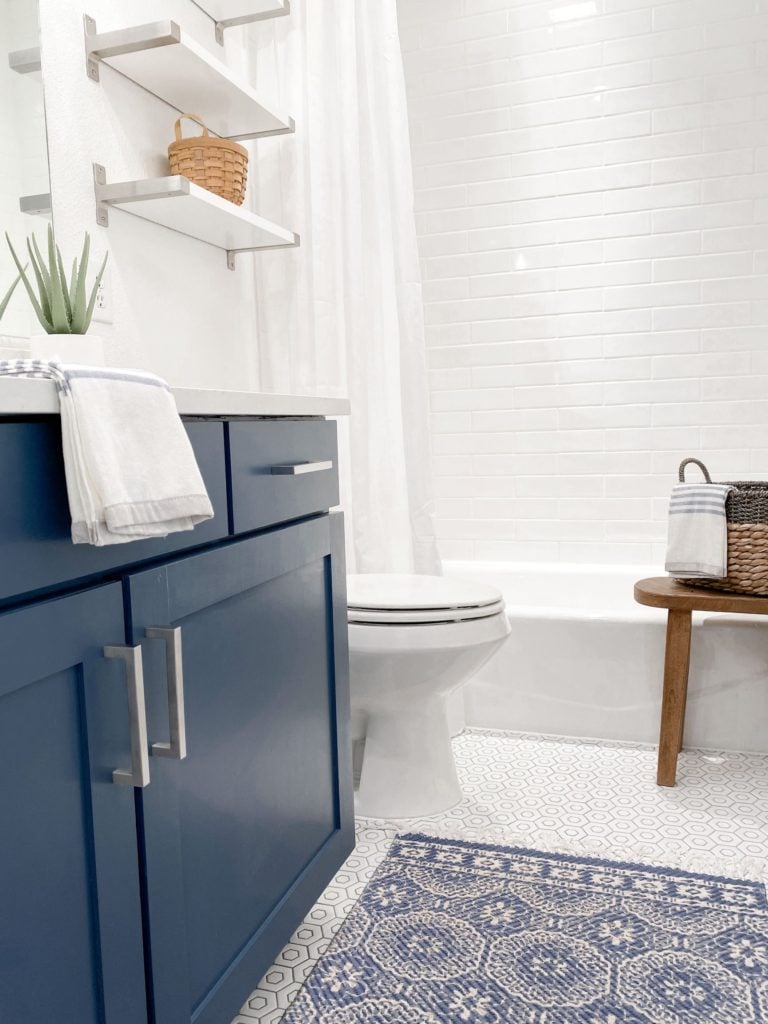
Next, Dave cut the strips to the right size and installed them on the front of the cabinets with glue and brad nails.
The extra 1/4″ width on the front of the cabinets does make them stick out a bit more than the drawers, but I don’t think most people would notice–and I like the look much better than flat fronts.
How much does it cost to remodel a small bathroom?
The total cost to remodel our small bathroom was approximately $1,200.
We originally planned to spend $1000 on this small full bathroom remodel; however, with the additional cost for new wallboard and a few extra features, we went slightly over that amount.
I love that we were able to make this bathroom feel like a whole new space, giving it an entirely new look without making any structural changes — and while (mostly) staying within our budget!
Where to Shop for Bathroom Fixtures
Investing in a bathroom faucet, lighting, mirrors, and cabinet pulls for a DIY bathroom remodel doesn’t have to break the bank.
Below are a few of my favorite places to shop for bathroom fixtures, lighting, mirrors, and more:
Wayfair
Serena & Lily
McGee & Co.
Pottery Barn
Rejuvenation
Amazon
West Elm
Lowe’s
And here is a selection of bathroom vanities, faucets, mirrors, door and drawer pulls, cabinets, and lighting in various finishes and colors.
Bathroom Faucet Ideas
Bathroom Lighting Ideas
Bathroom Mirror Ideas
Cabinet Pulls and Knobs
Vanity and Linen Cabinet Ideas
For more DIY bathroom remodel ideas and inspiration, you might be interested in these posts:
A Simple Guide to Mixing Metals in the Bathroom
Beautiful Bathroom Ideas, Design Trends and Decor for 2024
Our Master Bathroom Remodel Reveal
Bathroom Wall Mirror Ideas for Every Style and Budget
How to Paint Bathroom Cabinets, a Step-by-Step Guide
Beautiful Modern Bathroom Design Ideas You Will Love
Our small full bathroom remodel was a labor of love from start to finish.
After living with this dark old bathroom for years, I’m so excited to finally have a bright new bathroom for our guests to enjoy. Next up: our master bathroom makeover!
If you have any questions regarding our low cost DIY bathroom renovations or how to paint bathroom cabinets, send me a message or leave me a note in the comments! xo Jane
Content might contain affiliate links. If you purchase through a link, I may receive a commission at no cost to you. Please see my disclosure policy for details.


16 Comments
Teresa
January 6, 2023 at 11:27 pmHi, I love your guest bathroom, can you tell me where to purchase your white shower curtain? Thank you.
Jane
January 7, 2023 at 2:44 pmHi Teresa! Thank you so much — the curtain is from Amazon, which is the only place I could find an extra long one. It’s called the N & Y Home Extra Long Shower Curtain Liner, and I have the 72 x 96. Hope this helps! xo Jane
Melissa
December 28, 2021 at 11:02 amHi Jane,
What a beautiful transformation! I was hoping you could share more details around the countertop. I was looking into possibly painting ours, but based on reviews and others trial and error, it seems that replacing it all together is the best approach. How difficult was it to remove the existing countertop and install the new one? Our vanity piece is about the same size/design as yours.
Jane
December 28, 2021 at 3:33 pmHi Melissa, Thank you so much for your lovely comment and kind words! My husband removed the old countertop by prying it loose from the existing vanity using a chisel, crowbar, etc. It probably took an hour or so, but he was able to remove it without damaging the vanity or the wall. He also installed the new countertop himself, which I think was probably easier than removing the old one. We were actually able to sell the old countertop on Facebook Marketplace, which was nice! If you decide to go this route, you might want to check YouTube for videos showing the exact procedure for removing and installing countertops. I wish you all the best with your bathroom updates! xo Jane
Laura Knowles
August 1, 2021 at 10:47 amHi Jane,
I’m in the middle of a bathroom remodel and am looking at the shelves you have above the toilet. I see that they are Bergshult shelves from Ikea. It seems that they are about 24 inches long at the most, maybe shorter. However, Ikea only have them in 31 inches and 47 inches, which is way too long for my bathroom. Any idea how long they are?
Thanks,
Laura
Jane
August 1, 2021 at 12:46 pmHi Laura, You have a great eye! Our Ikea shelves are 22″ long. One of the wonderful things about these shelves is that they can be cut to whatever size you need, and the metal endcaps hide the cut end. I hope this helps answer your question — if not, please let me know. I wish you all the best with your bathroom remodel! xo Jane
Kathryn Hand-Savage
July 23, 2021 at 3:03 pmI love the guest bedroom remodel! Could you disclose the information on where I could find those items. I love the headboard!
Jane
July 26, 2021 at 7:36 amHi Kathryn, Thank you so much for your kind words! I have a page sharing all the sources for our guest bedroom, which is on the top menu under the “Our Home” tab. Here is a direct link to that page: https://jane-athome.com/guest-bedroom
The blue headboard was a HomeGoods find, but the following ones are very similar (note–these are affiliate links):
From Amazon: https://bit.ly/3eYWXp3
From Wayfair: https://bit.ly/2UHAd6k
From Wayfair: https://bit.ly/3kYvFCX
I hope this helps! Have a wonderful day, xo Jane
Sadie
November 24, 2020 at 8:06 amI love the blue you chose for the vanity! We are planning on redoing our bathroom as well. We also had professional cabinet painters do our kitchen and we love how it turned out, but we’re trying to do the bathroom on a much smaller budget so DIY painting it is! Thanks for sharing your bathroom reno! It gave me some really great ideas for ours!
Julie Kolln
October 18, 2020 at 11:25 amWhat a beautiful transformation! I wish I knew how to tile!
Jane
October 19, 2020 at 2:53 pmThank you so much Julie! I’ve never tried tiling either–thank goodness my husband actually seems to enjoy it!;) xo Jane
Carol Heartfelt Whimsies
October 18, 2020 at 8:23 amWhat a beautiful transformation!! Gives me hope for our kitchen! Love your choices! Timeless yet on trend, too.
Jane
October 19, 2020 at 2:51 pmThank you so much Carol! Your lovely comments always brighten my day! xo Jane
Leila Capell
October 16, 2020 at 4:06 pmVery nice apart from the subway tile which I hate. It reminds me of the underground public washrooms that were in the UK. I’ve never forgotten them.
Tricia
October 10, 2020 at 11:11 amThis is gorgeous. What a difference a little trim makes too. You have lucky guests!
Jane
October 10, 2020 at 3:52 pmThank you so much Tricia! So happy to have this project completed! xo