
It’s taken me a little while to put this post together, but I’m excited to finally give you an update on our kitchen renovation on a budget, with information on sources and costs, including the kitchen cabinet painting cost (we ended up having our kitchen cabinets painted professionally), and much more!
Once I began talking about our kitchen project over on Instagram, I started receiving questions about sources and costs, so I wanted to share what we chose, why we chose what we did, what we would have done differently, and some tips for planning your own kitchen renovation.
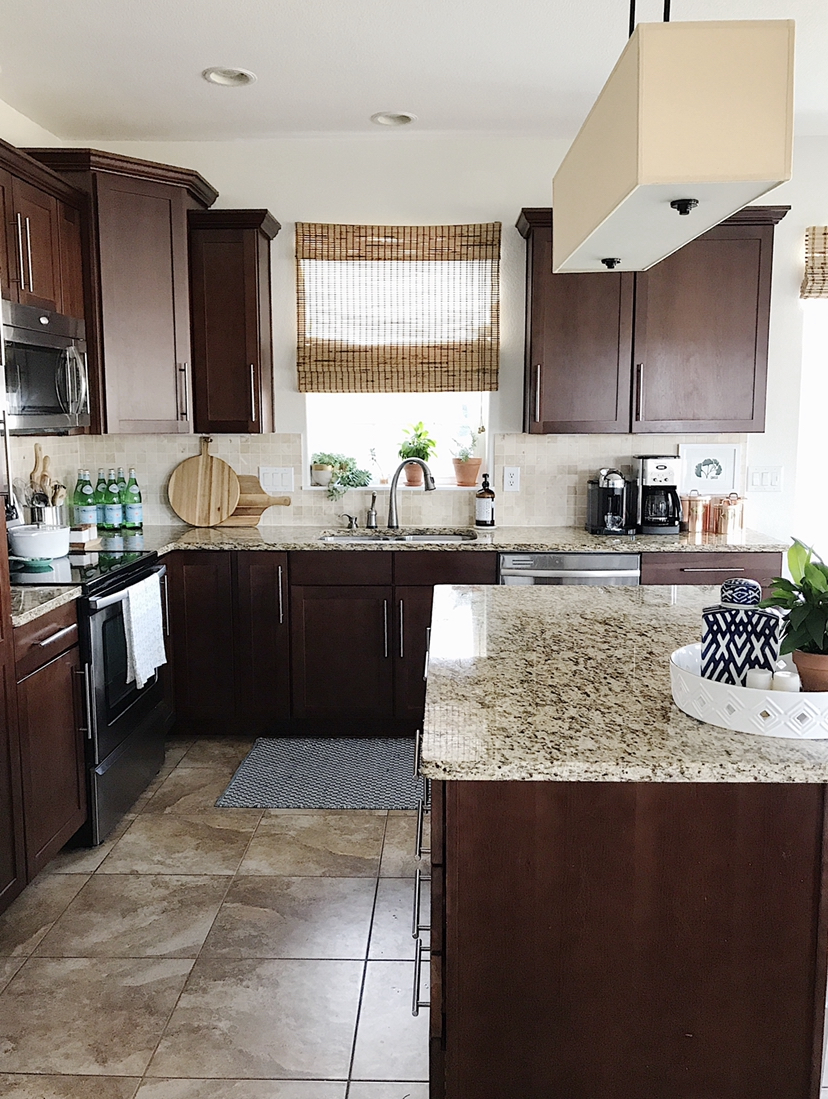
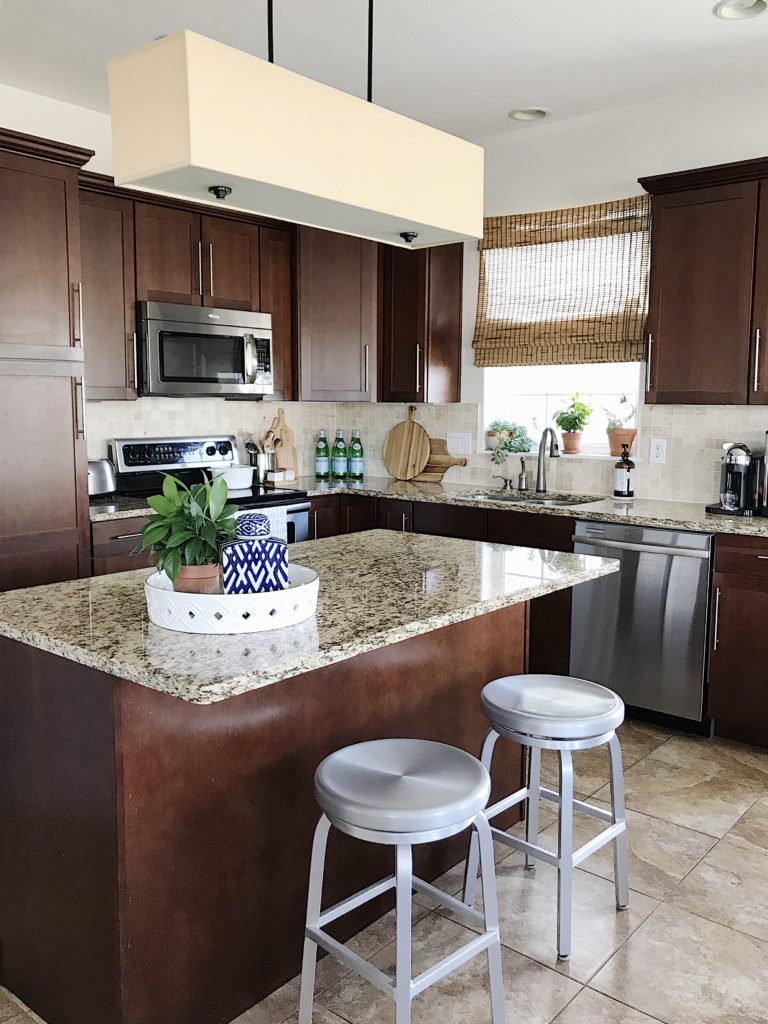
Here are a few photos showing what our kitchen looked like just a few weeks ago, with cherry cabinets, granite countertops, stone backsplash, stainless steel sink, and brushed nickel hardware.
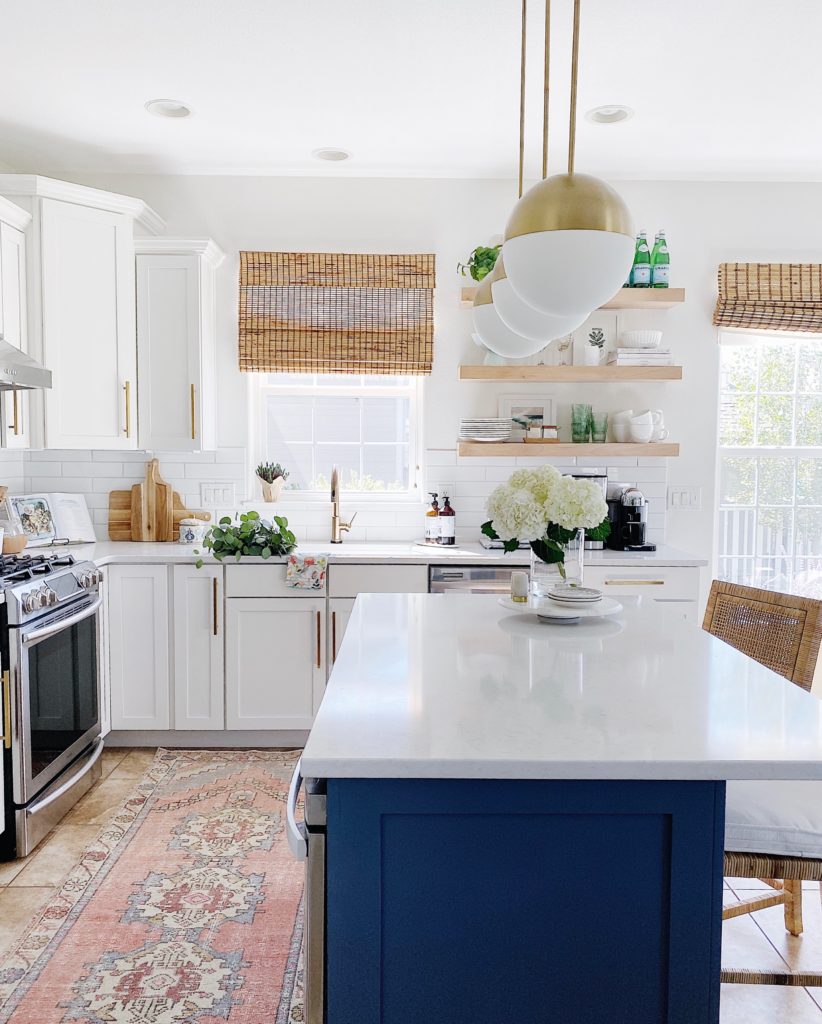
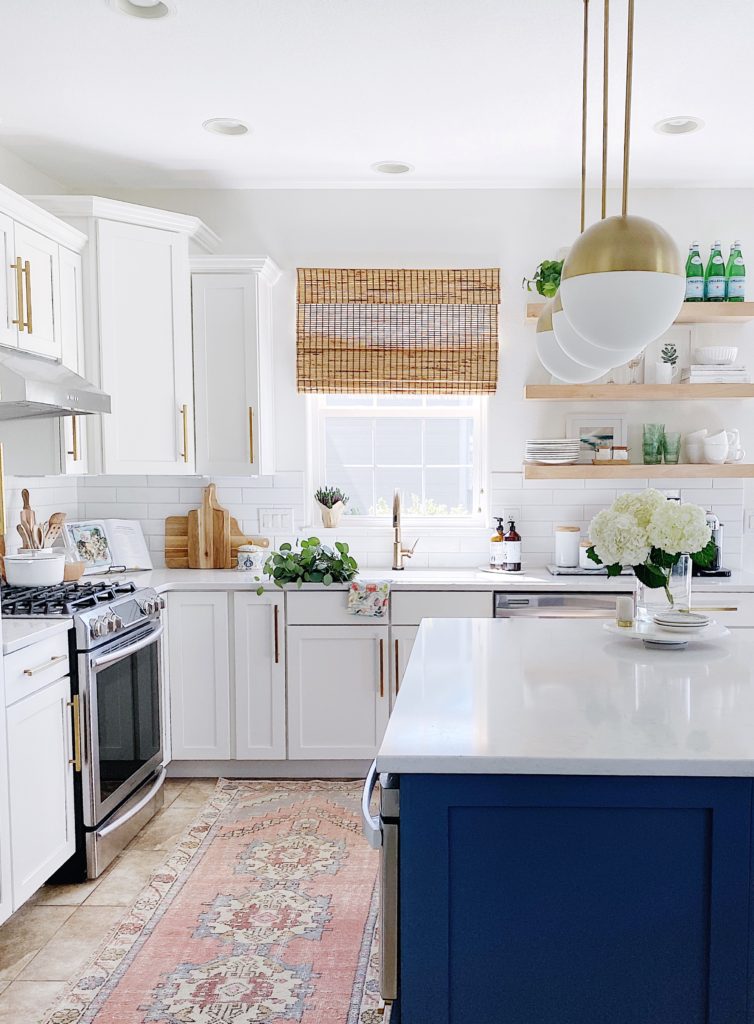
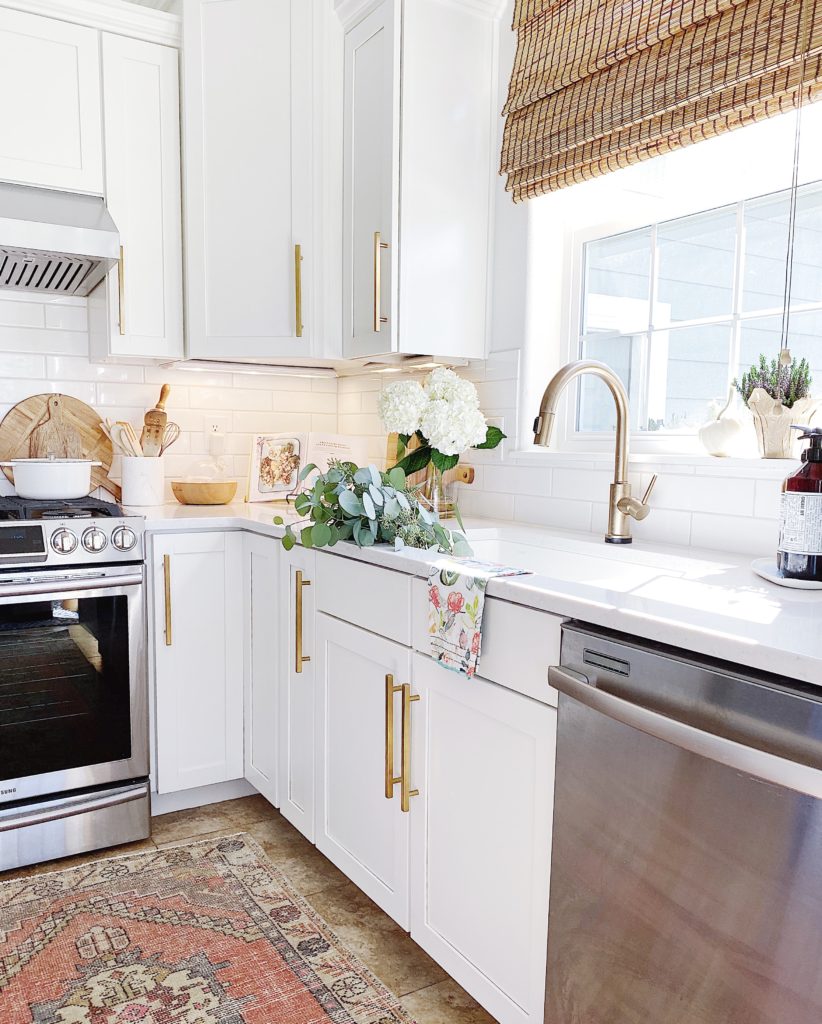
And here’s the after:
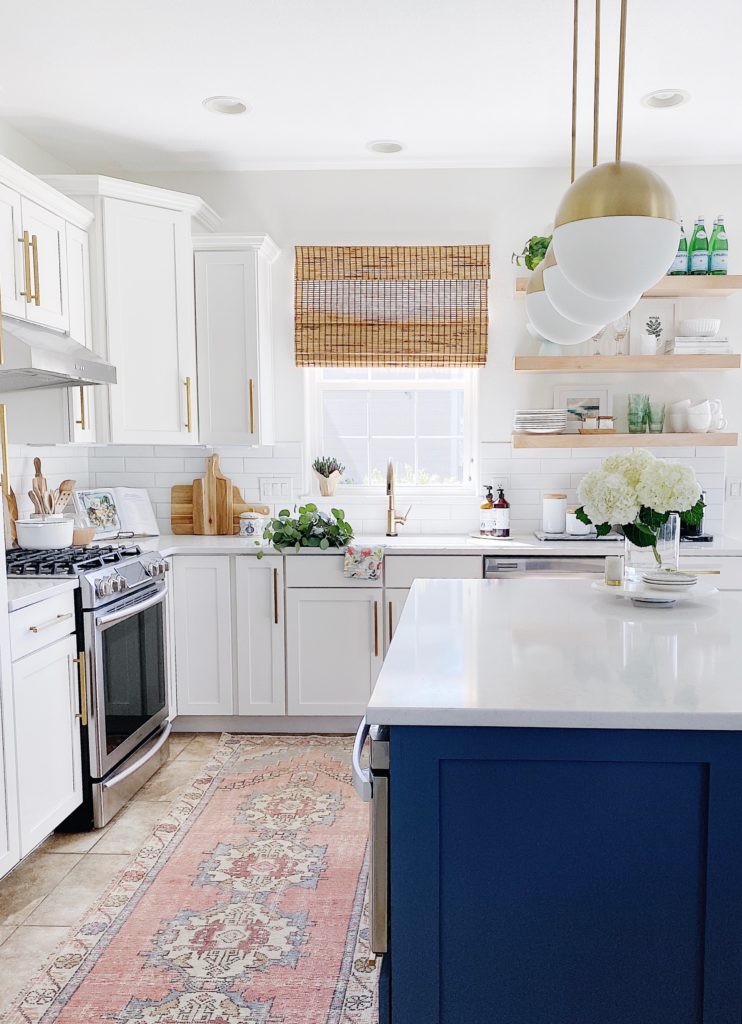
Every time I walk in the room I can’t believe how much brighter and happier this space feels!
Kitchen Renovation Timeline and Kitchen Cabinet Painting Cost
To stay within our budget, we kept our old layout, cabinets, dishwasher and refrigerator, so I guess this was more of a kitchen makeover than a full-on kitchen remodel. Here’s our renovation timeline:
1. Create a kitchen design board
Deciding on the look, feeling, and color scheme for this space was the most important step, because it helped me clarify my vision for our kitchen.
Honestly, I don’t think our kitchen makeover would have happened if I hadn’t taken the time to create this simple kitchen mood board a few months before renovating:
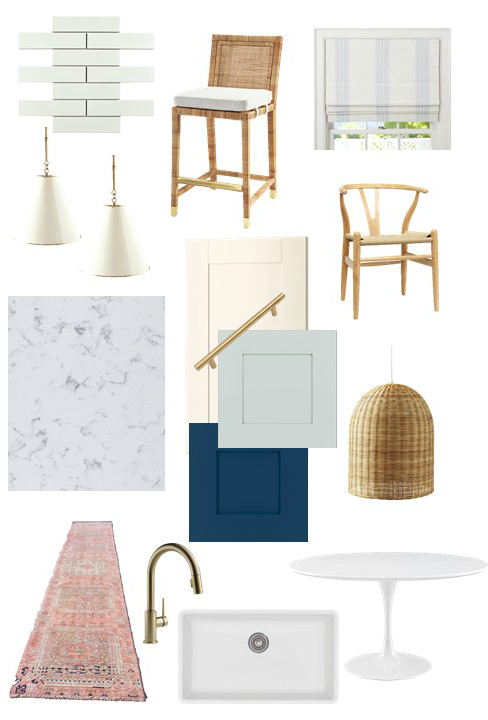 Tile // Bar Stool // Roman Shade // White Lighting
Cabinet Pulls // Wishbone Chair // Woven Lighting
Rug // Faucet // Sink // Table
Amazingly, the final look ended up pretty close to what I had in mind! I guess that shows the value of creating a mood board before you embark on any project–even if it’s just a Pinterest board filled with inspiration or magazine clippings glued to a piece of poster board.
2. Install a new microwave
Part of my plan was to remove the microwave that was hanging over our old electric range. Since Dave uses the microwave a lot, he wasn’t ready to let it go, so we compromised on the idea of an under-the-counter model.
Dave was able to install the new microwave in an existing 24″ lower cabinet of our island by removing three drawers.
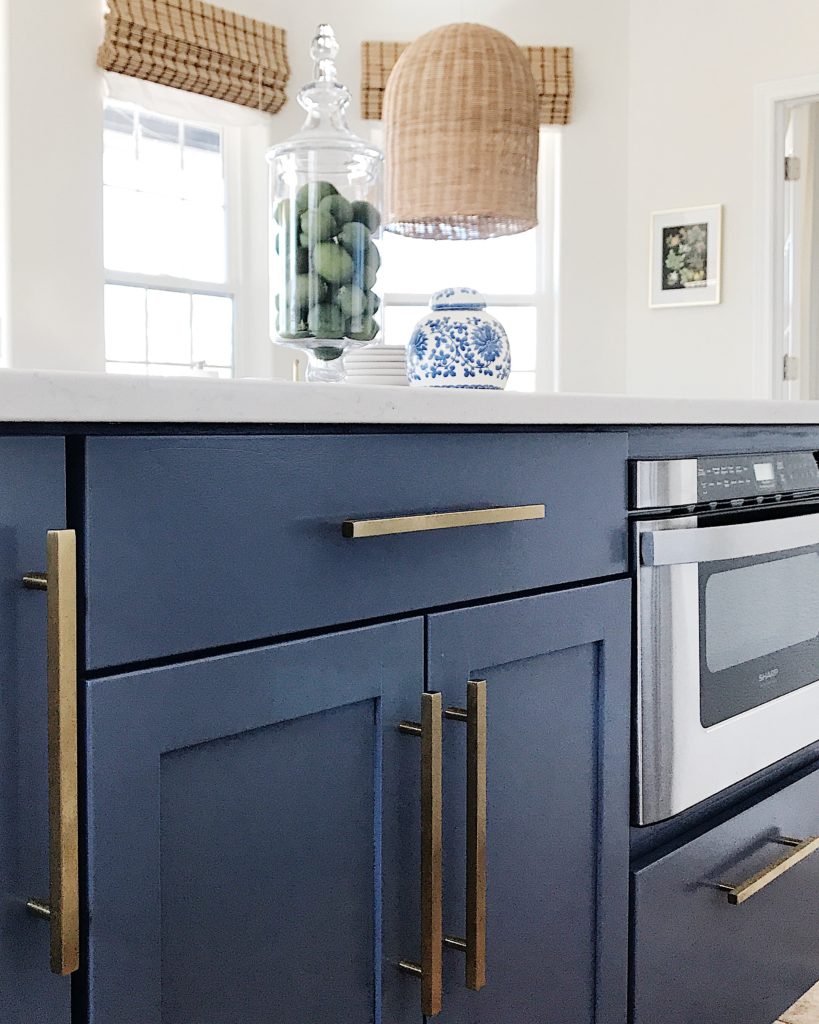
I kind of struggled with losing those drawers, but by shifting things around and organizing my kitchen a little better I was able to give them up with very little inconvenience. And we love our new microwave–it’s so nice to be able to remove hot things without having to reach over my head!
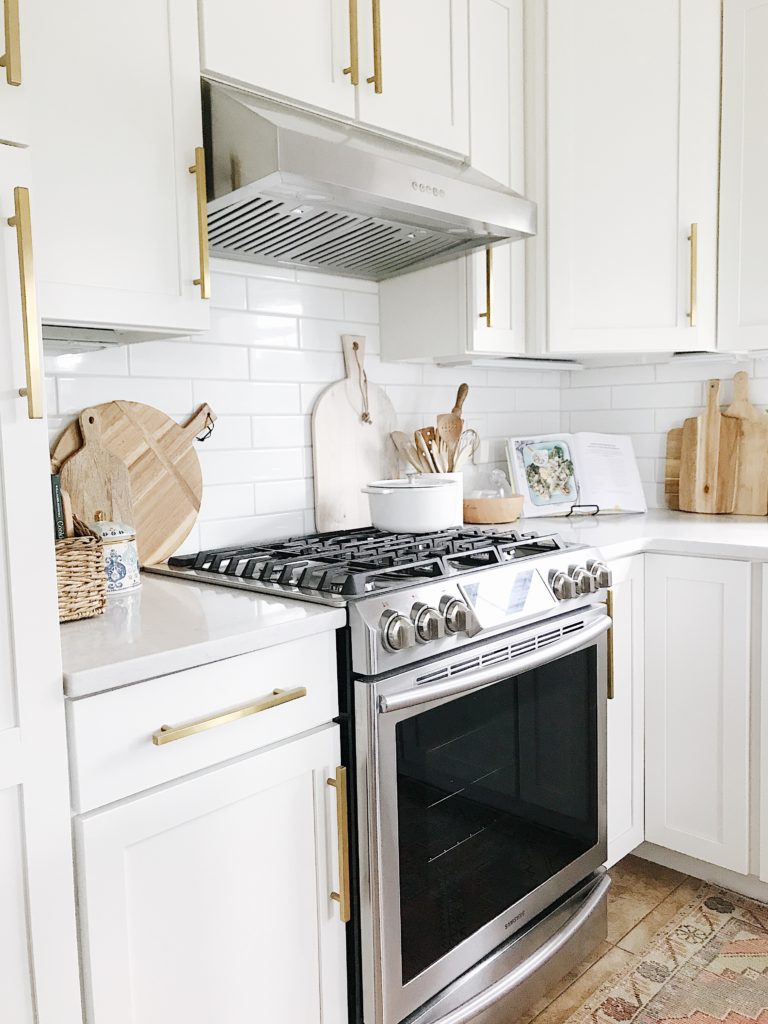
Initially, I also wanted to remove the cabinet over the stove and add a big, wooden vent hood over our new gas range, but in the end it was much easier and less expensive to add a stainless steel under-the-cabinet vent hood (this one’s no longer available), and I’m happy with the look. Plus, we were able to retain some of the storage in the upper cabinet.
3. Remove the old backsplash
Dave tackled this project himself, and it was by far his least-favorite part of the entire process! Our old backsplash tile was firmly glued to the wall board, which meant that no matter what he tried (including heating the tiles and trying to pry them off one by one) huge chunks of wall board came off along with the tile.
Ultimately, he just cut out all the old wall board and replaced it, which meant taping, mudding, sanding, patching, etc. In short, this ended up being a huge job, so you might want to think about hiring someone to do it.
4. Choose and purchase countertops.
I knew from the start I wanted quartz countertops for ease of care, but it took about two months of debating and shopping before I finally landed on “Lagoon” by Silestone. At first, I thought I wanted something with more distinct veining, but since quartz countertops are manufactured and the pattern repeats, I didn’t want to take a chance on ending up with a stripe-y look on the island. Lagoon has subtle gray veining, is simple, classic, and goes with everything, which I love.
5. Purchase a new sink and faucet
We also had to have the new sink and faucet purchased and ready to go before the countertops were delivered because they all needed to be installed at the same time. Figuring out the timing of removing the old countertops, etc. was a little bit tricky, but thankfully we sold our old countertops, sink, and faucet on Facebook Marketplace just a few days before the new countertops were installed.
That meant we only had to wash our dishes in the bathroom for 3 or 4 days! 😉 Thankfully, Dave is super handy, so he was able to connect the new faucet and re-connect the garbage disposal once the new countertops, sink and faucet were installed.
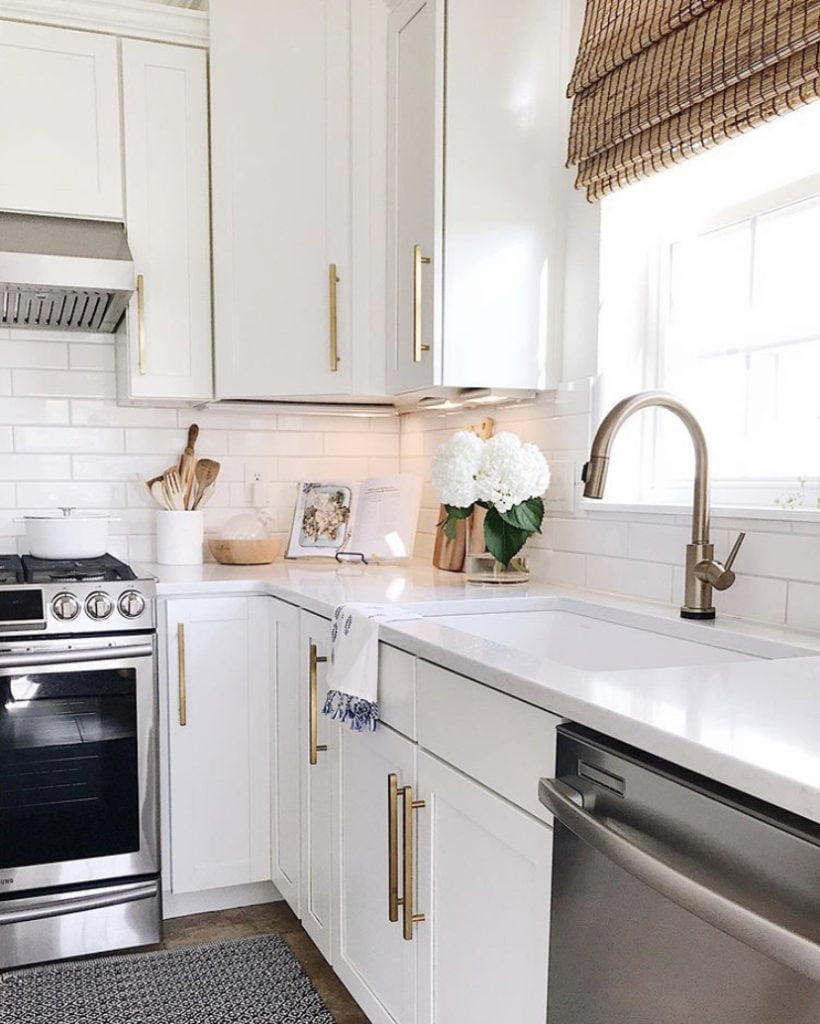
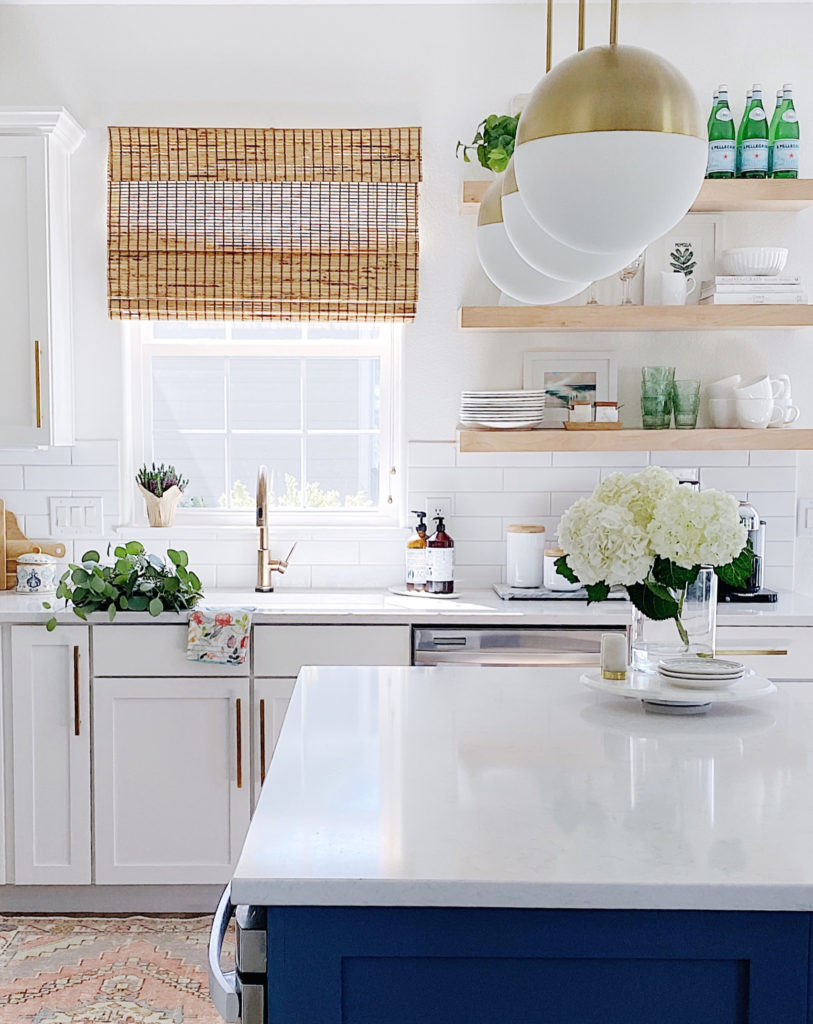
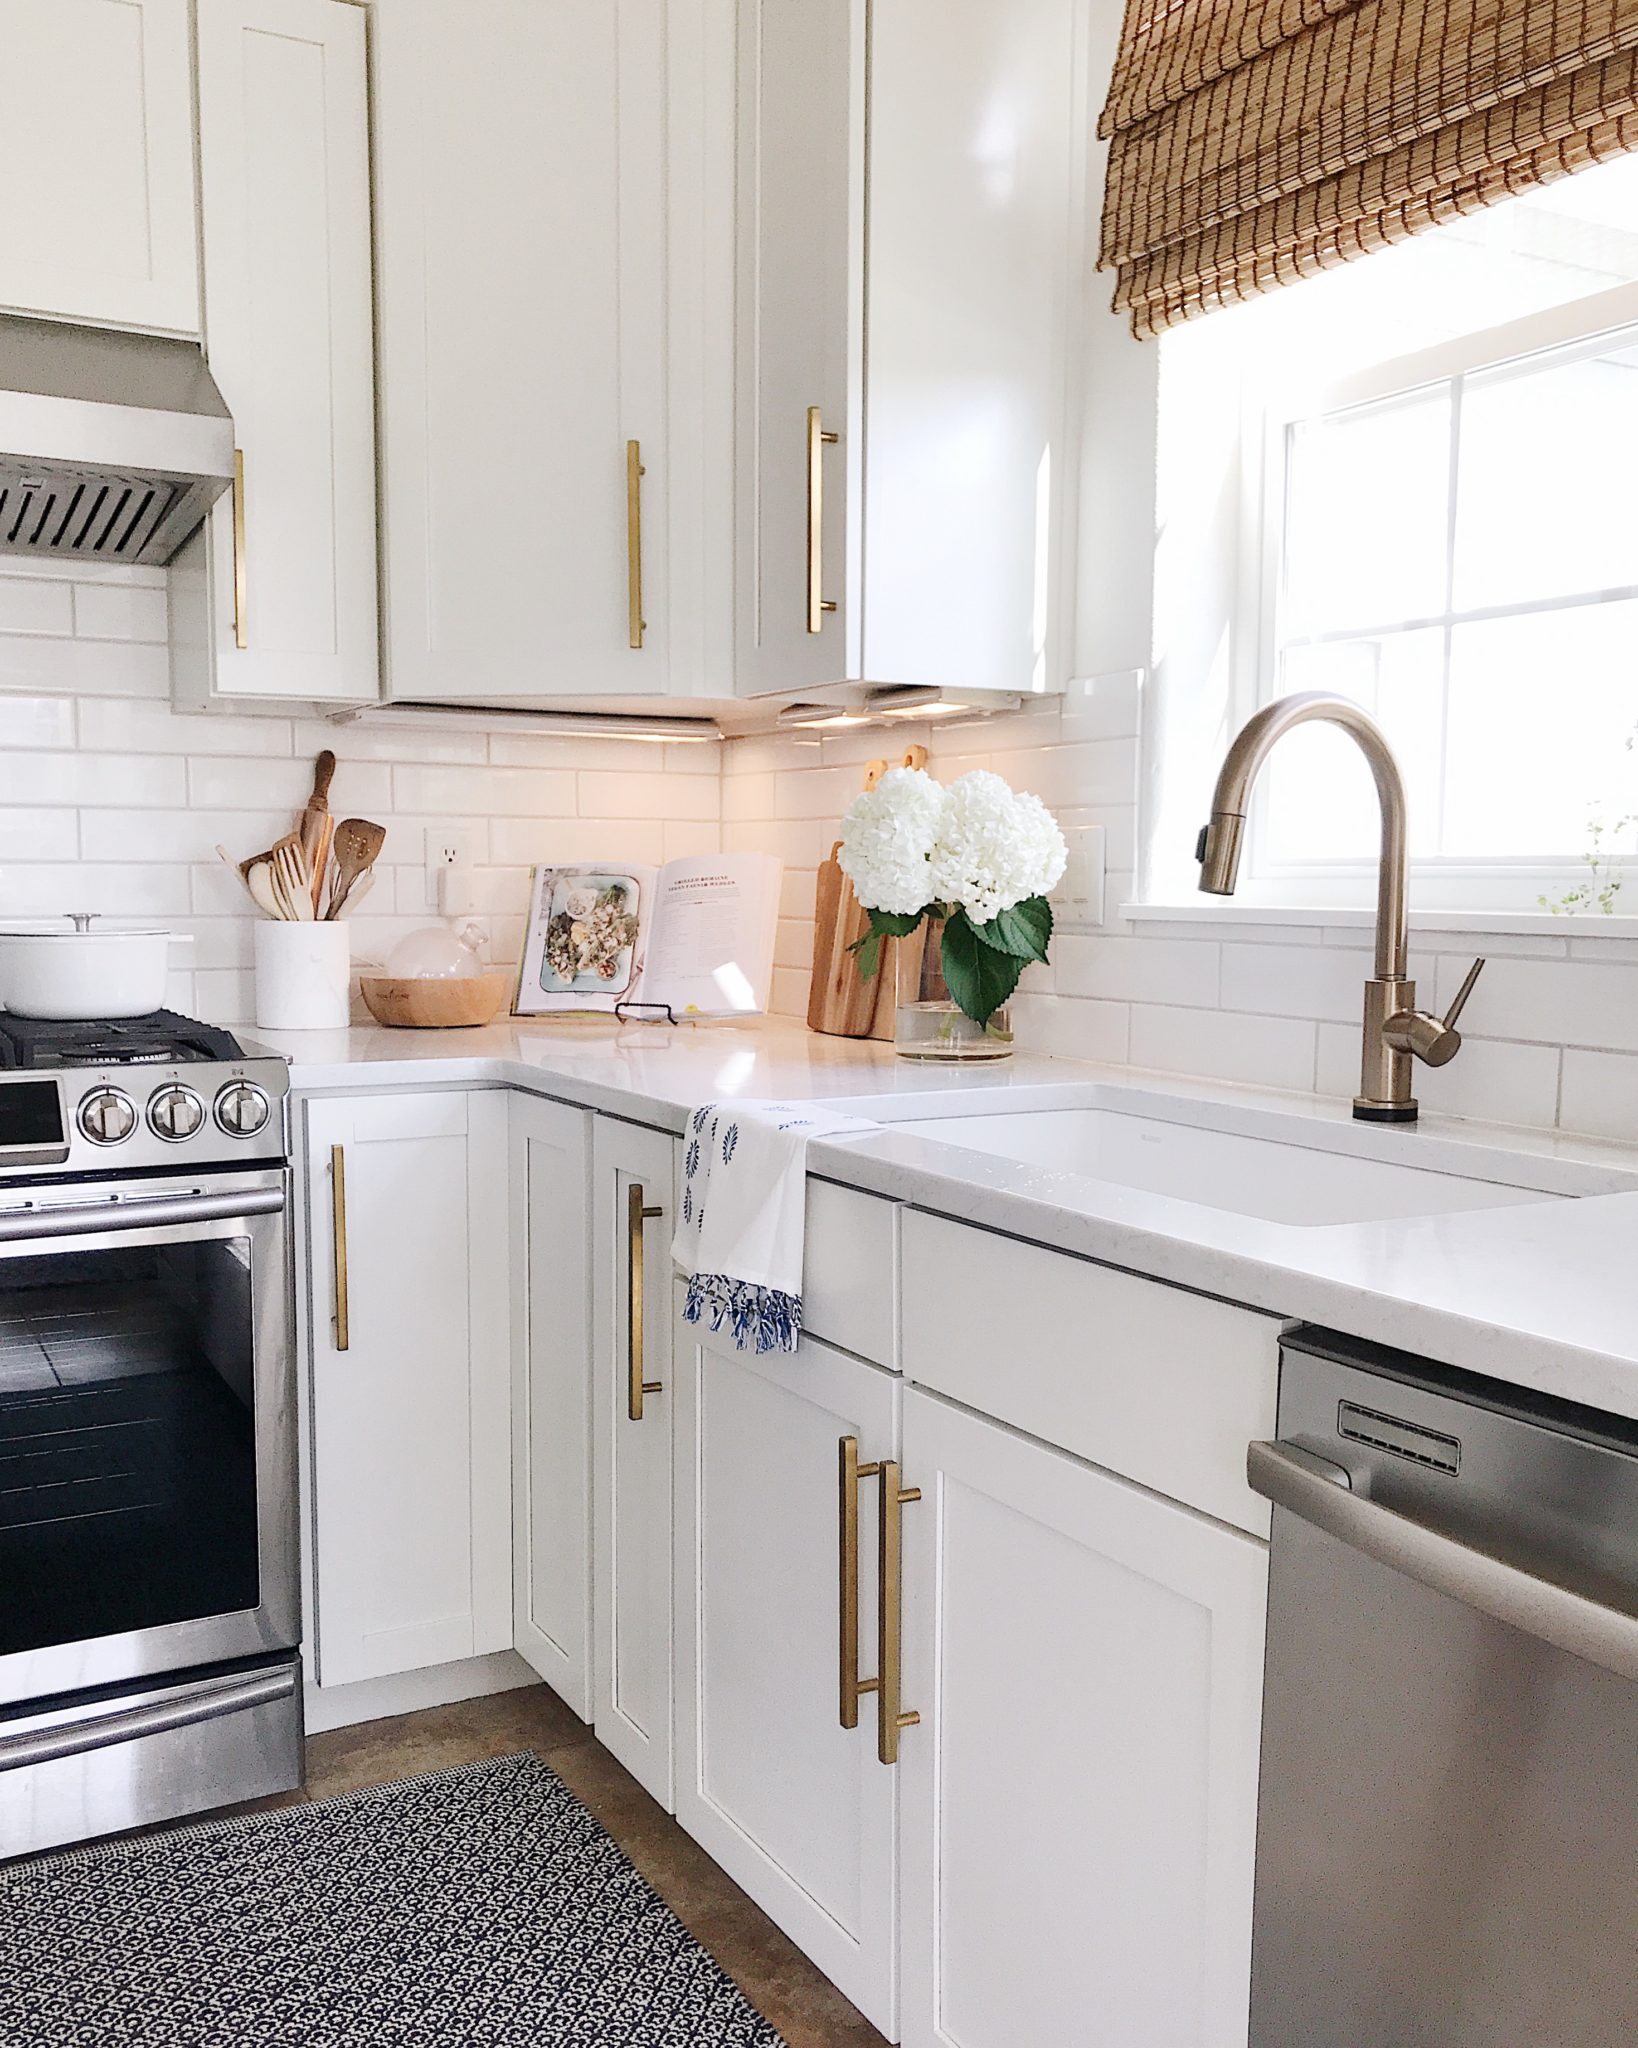
My new single-bowl white sink might be my favorite thing about this entire project (with the gold faucet a close second!).
I love being able to pile big pans in the sink–and the white color seems so much cleaner and fresher than our old stainless steel sink. If you’re wondering whether our white sink shows stains, I use Bon Ami, a non-toxic powder cleanser, to keep it looking white and clean.
6. Paint the kitchen cabinets and kitchen island
Hands-down one of the best decisions we made during our kitchen renovation was to pay someone to paint our kitchen cabinets. The small local company we used was wonderful.
The cost of having our kitchen cabinets spray painted professionally was well worth it (see the total kitchen cabinet painting cost below) and they did a much better job than we ever could have!
They came in, taped off everything, removed the old hardware, cleaned all the cabinets, did a light sanding, primed, painted, and poly-coated all the frames, took our kitchen cabinet doors and drawer fronts to their shop to spray paint and poly-coat, and then installed them, along with our new pulls, just a few days later.
I also had them spray paint the cabinets in our adjoining laundry room while they were at it.
By the way, we tried spray painting one of our brushed nickel cabinet pulls with gold/brass spray paint, since the old pulls were still in great condition, but it just didn’t look right.
Thankfully, we ended up finding brass/brushed gold pulls in the size we needed (no patching or drilling new holes!) at an amazing price. The new pulls aren’t quite as heavy as our old ones, but once they were installed we couldn’t tell a bit of difference–and we love the updated look!
I knew from the beginning that I wanted to use Benjamin Moore White Dove for the cabinets. White Dove appears on almost all the “recommended kitchen cabinet paint colors” lists I found over on Pinterest.
Plus, White Dove is the color our kitchen walls are painted, and I didn’t want to clash with that shade.
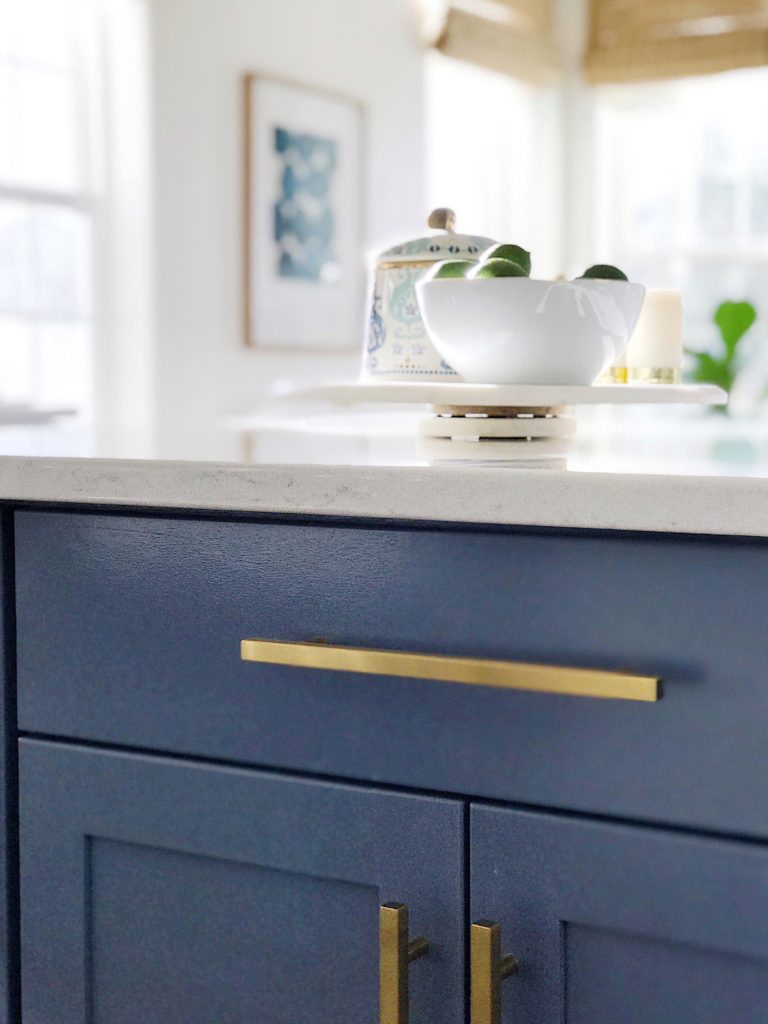
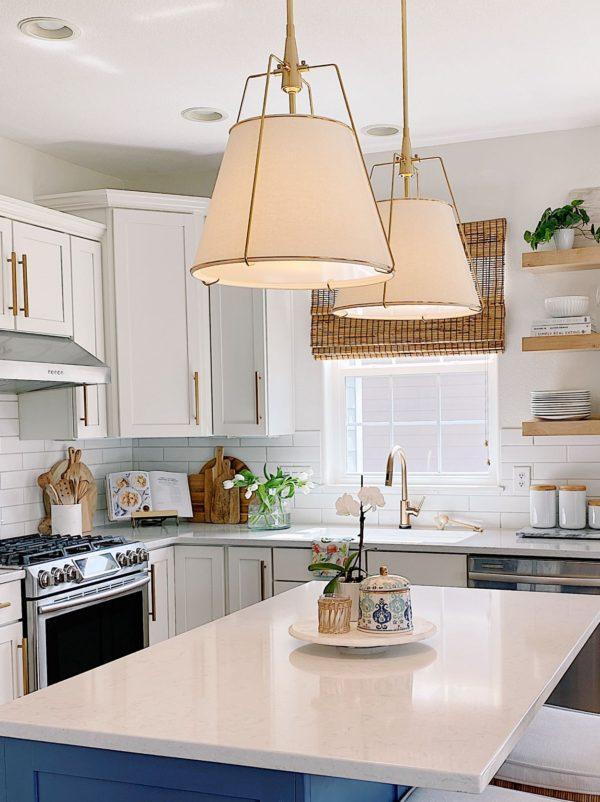
Kitchen island paint color
Choosing a blue paint color for the kitchen island was a bit trickier. I searched Pinterest and Instagram for ideas, writing down all the shades I loved.
Then I went to Lowe’s and had them mix up small jars of those colors and painted them on pieces of white poster board, which I then hung on the island so I could see how they looked during different times of the day.
Ultimately, though, I ended up going with “Distance,” by Sherwin Williams, recommended by our cabinet painter–see more on our kitchen cabinet painting cost below.
She’d used it in several other kitchens and brought over a sample for me. I immediately knew it would be just right for our kitchen.
It’s hard to see in photos, but it has a hint of grey in certain light. It’s a nice, classic blue–not too dark and not too light–not too green and not too purple.
I debated quite a while on whether to paint all the lower cabinets blue as well. And, honestly, sometimes I wish I’d just gone for it!
But I’ve always wanted a white kitchen, and we’ve lived with dark cabinets for the last several years, so white was an easy choice. Perhaps I’ll try a totally different look in our next kitchen!
7. Install subway tile backsplash
For the backsplash, we went with classic white subway tile, another easy decision. I did choose a longer, 12″ version for a slightly different look.
Choosing a grout color was much trickier, though. I went back and forth between Mapei “Frost” vs. “Warm Gray.”
Eventually, Dave helped me out by making a test board on a piece of cardboard, attaching a few extra tiles and grouting them with both colors. That helped a ton and I ended up choosing Frost, a light gray.
8. Remove upper cabinets and install floating shelves
Finding shelves that weren’t overly rustic-looking was a bit of a challenge! After searching for a long time, I found these wood floating shelves.
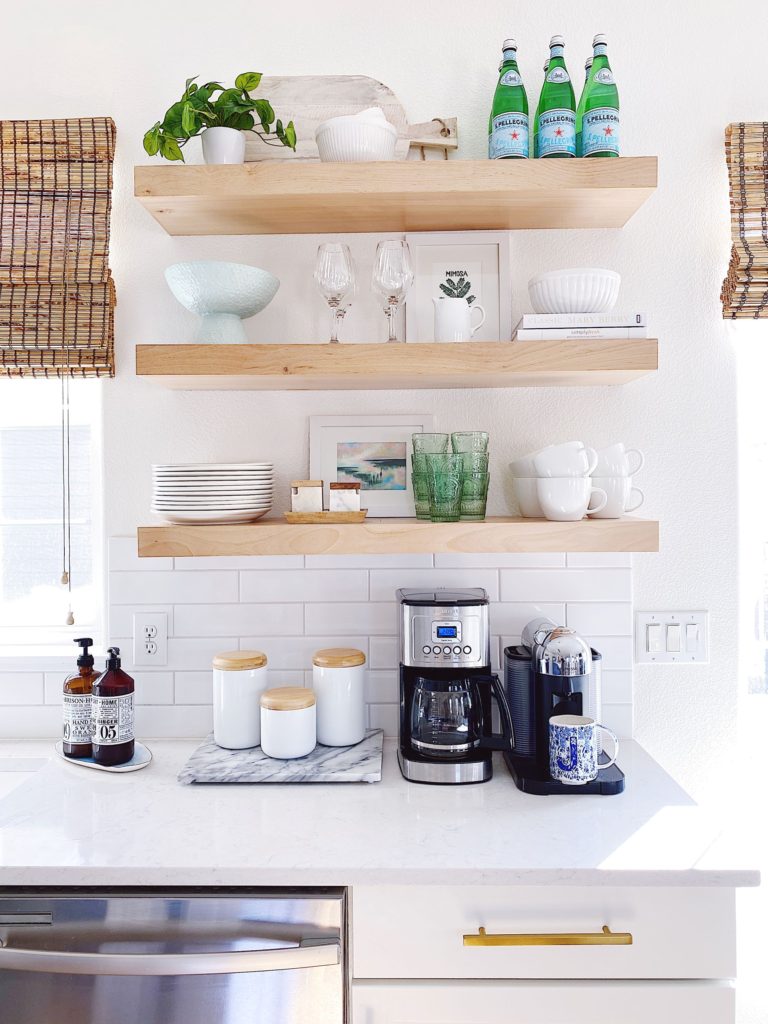
Each shelf holds up to 40 lb., so before adding anything to the shelves I weighed the dishes, etc., just to make sure I wasn’t overdoing it!
9. Kitchen Renovation and Cabinet Painting Costs
Since I always appreciate knowing how much it costs to renovate or remodel a space, I thought I’d break down the numbers for you, including the cost of painting kitchen cabinets professionally.
Our kitchen is actually pretty small, which helped keep our kitchen renovation costs down when it came to countertops and kitchen cabinet painting cost (which was priced per door, drawer, and panel). And, of course, prices will vary depending on where you live.
Here is a breakdown of our kitchen remodel costs, including the kitchen cabinet painting cost:
The cost of painting our kitchen cabinets professionally was $4100, which included painting our laundry room cabinets, as well.
Cabinet Hardware: $100
Gas Stove: $1500
Range Hood (discontinued) $350
Under the counter microwave: $750
Sink : $350
Faucet: $500
Silestone Quartz Countertops: $3100
Subway Tile (plus mortar & grout): $200
Floating Shelves: $300
Gas line installation: $550
Total Kitchen Renovation Costs: $11,800
We were able to sell our old countertops, sink, faucet, stove, microwave and lighting through Facebook Marketplace for $1000, so our total kitchen remodel cost came in just under $11,000.
We could have saved quite a bit of money on our kitchen renovation by painting the cabinets ourselves, and we did think long and hard about taking that route.
Ultimately, I think we made the right decision to pay to have our kitchen cabinets painted professionally. By hiring it out, the cabinets were painted within a week, allowing us to keep moving along with the project, which made the kitchen cabinet painting cost well worth it.
If we’d tried painting the kitchen cabinets ourselves, who knows how long our renovation might have taken? I also have a feeling that the spray painted finish on our kitchen cabinets is much more professional looking than our results would have been!
However, if you’re thinking about a kitchen remodel and are pretty handy with a paint brush/roller/sprayer, there’s a good chance you could keep your kitchen renovation cost well under $10k by painting your kitchen cabinets yourself rather than hiring a professional.
10. Ongoing kitchen updates
I’d love to replace our tile flooring, but our guest and master bathroom remodel projects are next on the list, so a flooring upgrade might have to wait a while.
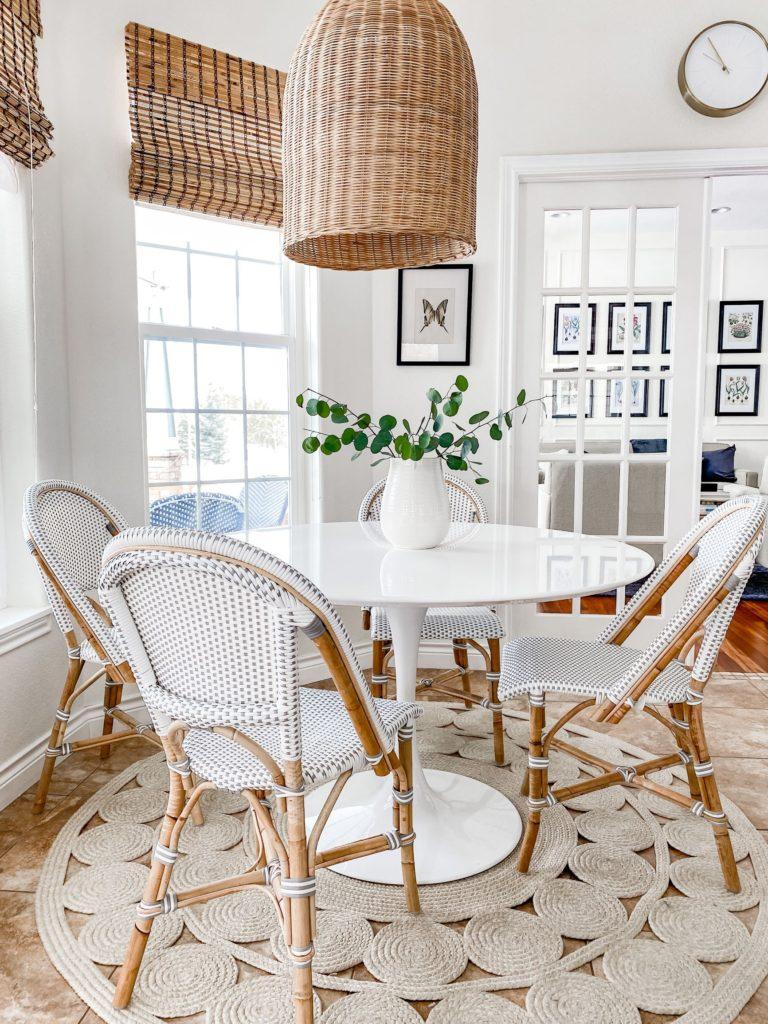
And here’s what our breakfast nook looks like after adding a new table, chairs, pendant light and rug:
We also recently replaced the lighting with these linen and brass light fixtures:
Our kitchen renovation was a labor of love from start to finish, and I’m so grateful for my husband’s amazing DIY skills! After years of dreaming and planning, I’m so happy we were able to give our kitchen the facelift it needed, while also sticking to our budget.
If you have any questions regarding our kitchen remodel, feel free to send me a message or leave a note in the comments!
shop the post:
Subway Tile // Cabinet Pulls // Turkish Rug (similar)
Faucet // Sink // Pendant Light Fixtures
Shelving // Gas Range // Microwave
Table // Chairs // Woven Pendant Light // Round Rug // Counter Stools
For more kitchen design ideas and inspiration, you might be interested in these related posts from Jane at Home:
2024 Kitchen Design Trends and Decorating Ideas
Modern Coastal Kitchen Ideas and Trends for 2024
The Best Kitchen Counter Stools & Bar Stools for Every Style and Budget
A Simple Guide to Mixing Metals in the Kitchen
A Simple Guide to Kitchen Cabinet Sizes and Dimensions (2024)
Popular Kitchen Cabinet Paint Colors for 2024
Choosing Pendant Lighting for your Kitchen
Affordable Oushak Runners for the Kitchen
Inspiring Kitchen Design Ideas to Inspire Your Next Renovation
Have a wonderful day! xo jane
Content might contain affiliate links. If you purchase through a link, I may receive a commission at no cost to you. Please see my disclosure policy for details.
24 Comments
Debbie
April 12, 2023 at 8:42 amCould you tell me where you got that cool salt & pepper set? I want something similar to add another element such as metal to the mix.
Thank you for responding to all my silly questions!
Jane
April 12, 2023 at 11:33 amHi Debbie! I love your questions — and they’re not silly at all, so please don’t hesitate to ask! That salt and pepper set came from Target. They still sell it, but it no longer has the gold accent. Here’s a link to the current version: https://bit.ly/410ZtkB. Have a beautiful day! xo
Debbie Myers
April 1, 2023 at 8:17 amI was just wondering which sizes of pills did you end up using?
Jane
April 1, 2023 at 8:57 amHi Debbie, our pulls are 10″ long with 7 1/2″ between the hole centers. Hope this helps! xo
Debbie myers
March 27, 2023 at 10:09 amYour kitchen is all that!!!! We’re in the middle of planning for our “all white” kitchen and everything you’ve done is exactly what I’d love to go. My fear of an all white kitchen is that would be too sterile looking, but you’ve manage to alleviate those fears with all the warm spots you’ve added. Brilliant! Thank you for your blog!
Jane
March 27, 2023 at 10:27 amThank you so much, Debbie! Your kind words truly made my day! I wish you all sorts of wonderful-ness with your upcoming kitchen renovation — I know it will be beautiful! xo Jane
Debbie Myers
March 28, 2023 at 9:31 amNo, thank you! I’m excited to have a little coffee spot incorporated into the space. I just love the floating shelves! It seems to make it look more open and airy.
Barbara Thomas
December 28, 2022 at 12:17 amLove the renovation.
So many similarities in what we are doing but we will yet be in the middle of it for a while .
Thank you for the finished vision…. its lovelier than my sample pieces and scrawled notes.
Rebecca
April 22, 2021 at 4:47 pmAre your countertops 2cm or 3cm?
Jane
April 22, 2021 at 5:11 pmHi! They are 3cm.
Anonymous
April 23, 2021 at 8:34 amThank you!
Miche Ortega
January 20, 2021 at 8:43 amYour kitchen is just gorgeous, and this blog was so helpful. We have future plans to change out our counter tops and sink, and have been looking at quartz. This gives us a little more guidance into products to look at. Thanks so much.
Jane
January 20, 2021 at 12:43 pmThank you so much for your lovely comment, Miche. I wish you all the best with your kitchen remodel! xo Jane
Anonymous
November 21, 2020 at 11:03 amWow, it’s amazing how much lighter your kitchen looks! You did a great job! I love that you listed everything like paint colors, accessories, etc.! When I try to click on the rattan pendant light I can’t seem to get the link. Where did you purchase it? Thank you!
Tana - Your Marketing BFF
January 31, 2019 at 6:52 amYour refresh looks amazing! You guys did a fabulous job!!!
Jane
January 31, 2019 at 8:07 amThank you so much, Tana! That means a lot to me. I’m finding that I actually enjoying cooking more in a lighter, brighter space! Have a wonderful day, my friend! xo jane
Laura
January 15, 2023 at 1:17 pmYour kitchen makeover turned out beautifully! We’re undergoing this same facelift right now and I can’t wait to get our counters installed next week! Wanted to reach out to see what you used for the cabinet lighting. Do you have a link for those? Thanks in advance!
Jane
January 15, 2023 at 4:45 pmHi Laura! Thank you so much for your kind words! The under-cabinet lighting was installed and hardwired in by our homebuilder, so I don’t have an exact source, but I do know that most hardware stores and Amazon carry them in different sizes. Ours don’t appear to have a brand name on them, but here’s something similar I found on Amazon: https://bit.ly/3ZAZsDM. Let me know if you have any more questions. I wish you all the best with your kitchen updates! xo Jane
Ann
January 26, 2019 at 8:52 pmHi Jane,
I’m loving your kitchen renovation. Would love to paint my cabinets white. They are the same colour as your old ones. New backsplash, I was think beveled white subway tiles and a quartz marble lookalike countertop. Your kitchen is so similar to my dream kitchen. Also like you, the kitchen I have now is New and not bad just not my style. I was going to go with BM Hale Navy for the counters. Everything is spot on. I had to pause when I saw your kitchen because it’s everything I want. How much did you pay for painting your cabinets? Apart from the quartz counters I think this will be the biggest expense. Thanks my darling
Jane
January 27, 2019 at 9:23 amHi Ann! Thank you so much for your kind words! It sounds like we definitely love the same style of kitchen! I also thought of using Hale Navy on our island cabinets, and I think it would be a great choice! Having our cabinets painted was our largest expense–it cost $4000, which was even more than the cost of the countertops! We received estimates from four different painting contractors and they all quoted around the same amount. At first, we balked at the price but eventually decided it was worth it to us to have someone do it right. I believe the cost would have been around $3500 if we hadn’t done the laundry room cabinets as well. I have a feeling the cost depends on where you live, though, so I recommend checking with some local people to see how much it would cost in your area! I wish you all the best with your renovation! Please keep me posted on how it goes! xo jane
Stacy
January 26, 2019 at 6:42 amThank you for sharing! It’s beautiful!! Love, love, love your blue island!
Jane
January 26, 2019 at 2:39 pmThank you, Stacy! I appreciate that so much! Have a wonderful weekend! xo jane
Lisa
January 25, 2019 at 3:53 pmJane, your kitchen “refresh” came out beautifully!! Your countertop, brass hardware and faucet and that gorgeous runner are standouts but it’s all dreamy!! We are just beginning a kitchen renovation and my design board that I posted last week is so similar to yours, which doesn’t surprise me at all since I love your blue & white style! Seeing your kitchen makes me so excited to get to the other side of our reno! Thanks for sharing all the details – loved reading about them all!
Jane
January 25, 2019 at 4:22 pmLisa, thank you so much for your kind words of encouragement and support! They truly mean the world to me! I can’t wait to follow along with you on your kitchen renovation journey and am so excited for you, my friend! xo jane